Open-Source Project: Translate the data with Azure Translator
Last week I had a pleasure to speak at Areopa Webinars about Assisted Setup (Thank you Luc for having me). Those of you who would like to see the recording please visit YouTube: https://www.youtube.com/watch?v=zuPfPUvQzeA .
However, in the Q&A, I had been asked: “What about the translations? How to handle them?” I replied that “It is like a normal table so you can treat it the same way as other data.”.
And you know what? A second later I realized that this is not the answer that I would expect.
So, if you are curious how I would handle translations inside Business Central please see what I was doing during my last weekend in the evenings. I decided to publish the whole code and the app as an open-source project.
Azure Translations inside Business Central
In the times where we can easily translate everything using Google Translate why we should do anything manually to import translations into Business Central?
I decided to build a simple extension that will use Azure Cognitive Services and with almost one click allows users (or consultants) to translate needed data directly in Business Central.
At this moment the extension supports the standard tables which are mention below:
- Payment Terms
- Payment Methods
- Items
- Units Of Measure
- Shipment Methods
However, it is easy to extend it with other tables and custom tables. I plan to extend it with all standard tables that require translations in near future.
Steps to set the app
In the GitHub repository, you can find the whole source code: https://github.com/mynavblog/Translations. If you want, you can just install the BC4All.com_Translations_1.0.0.0.app.
Note that objects are in the range of 50400 – 50499.
To use the app, first, you need to install the Azure Cognitive Service – Translator on your Azure Portal. The service is cheap and up to 2M chars, it is free.
More about the service you can find here: https://azure.microsoft.com/en-us/services/cognitive-services/translator/
More information about pricing you can find here: https://azure.microsoft.com/en-us/pricing/details/cognitive-services/translator/ .
Installation on the Azure Portal is very simple and takes just a few minutes. Find first cognitive services and then install the Translator app.
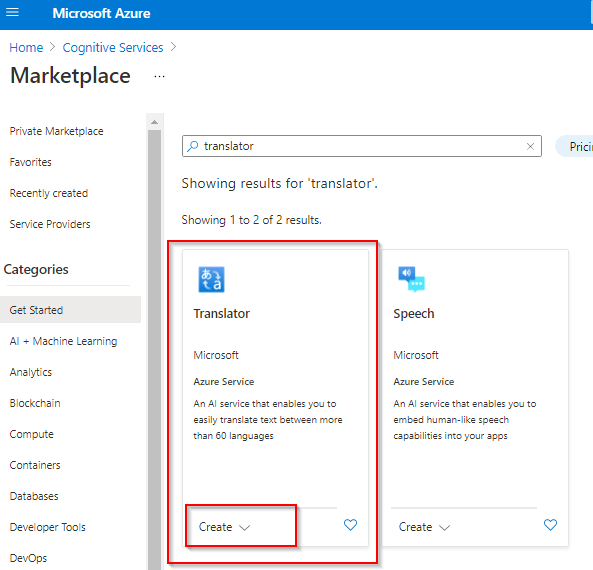
Fill in all necessary data and create the app. After installation, open it and go to Keys and Endpoints.
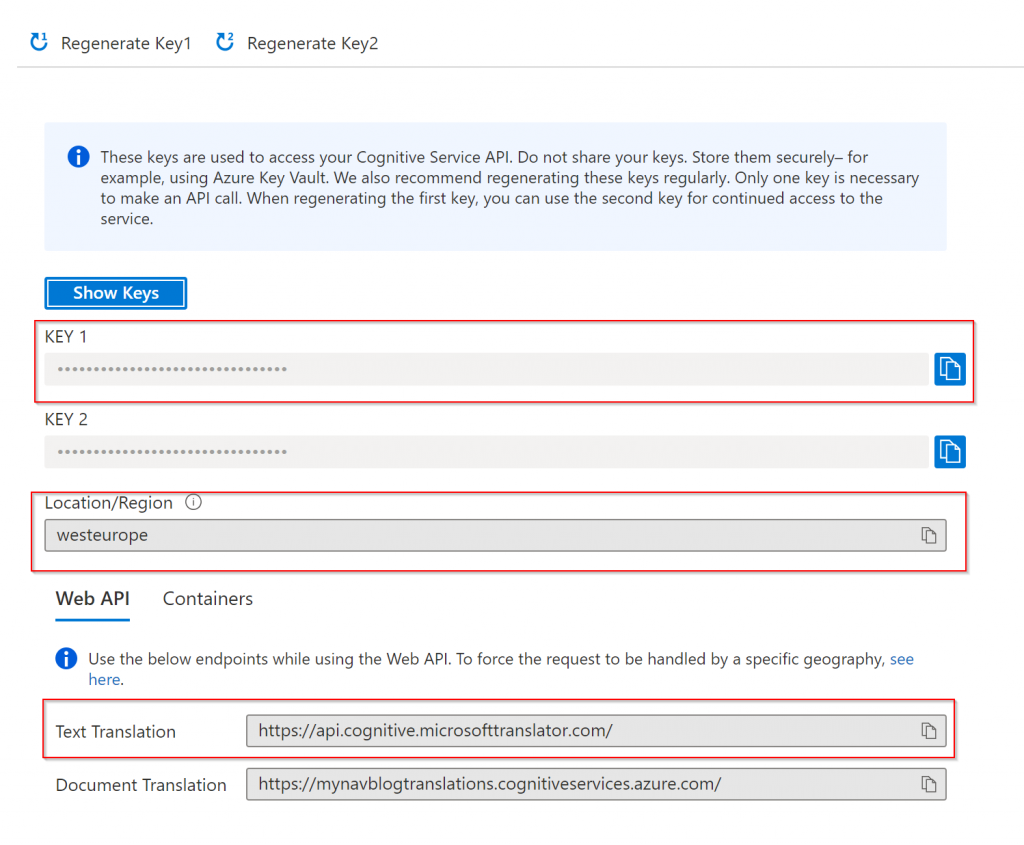
Those are values that you need to set in Business Central on Page Translation Setup (you need to install my app first to see the page in Tell Me)
![]()
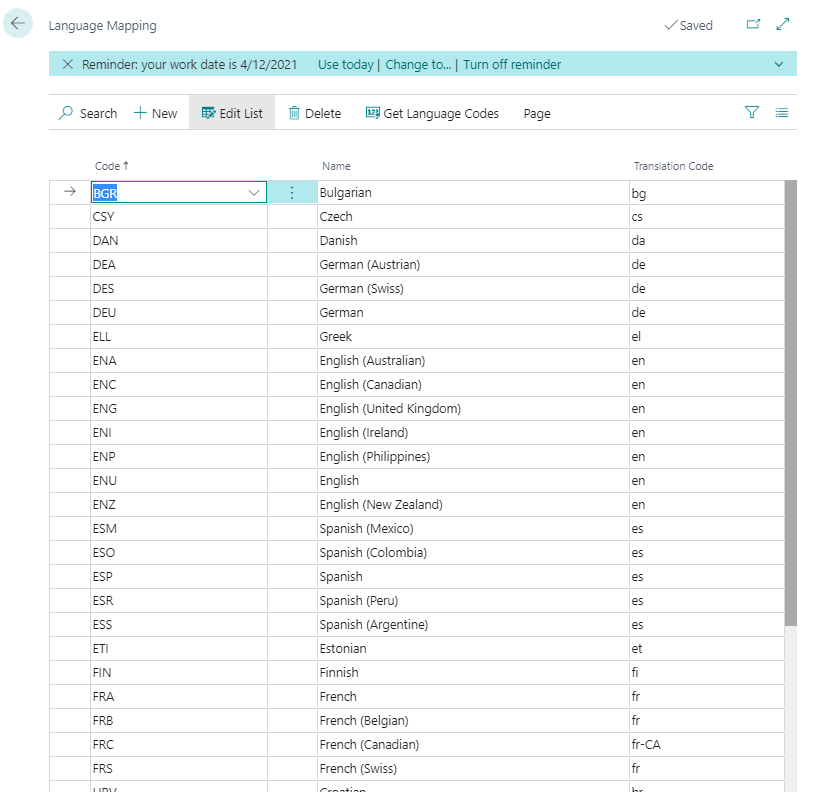
The next step is to add the language mapping. Business Central uses the 3 letters codes for language and Azure Translator uses only two. For example, the Polish language in BC is PLK but in Azure Translator it is PL.
To create language mapping on the Translation Setup page open Language Mapping and then use the action Get Language Mapping. It will create a mapping for you, but you always can insert manually, delete or correct the mapping if needed.

How to Translate the records?
After setup is done you can do the translations. Open one of the supported pages (for example Payment Terms), mark all records that you want to translate (yes you can mark many records), and run action Translate.
![]()
You will see the list of available languages. You can mark any number of languages.
![]()
When you will click OK system will connect to the Azure Translator and translate the records in just seconds. If any translation already exists in Business Central, it will be skipped (I do not want to overwrite what users already set).
![]()
![]()
How to contribute?
If you like the extension (I hope you do) and would like to contribute by adding new tables to it you can create a pull request to GitHub repository.
To extend the solution with any new table you need to do 3 things.
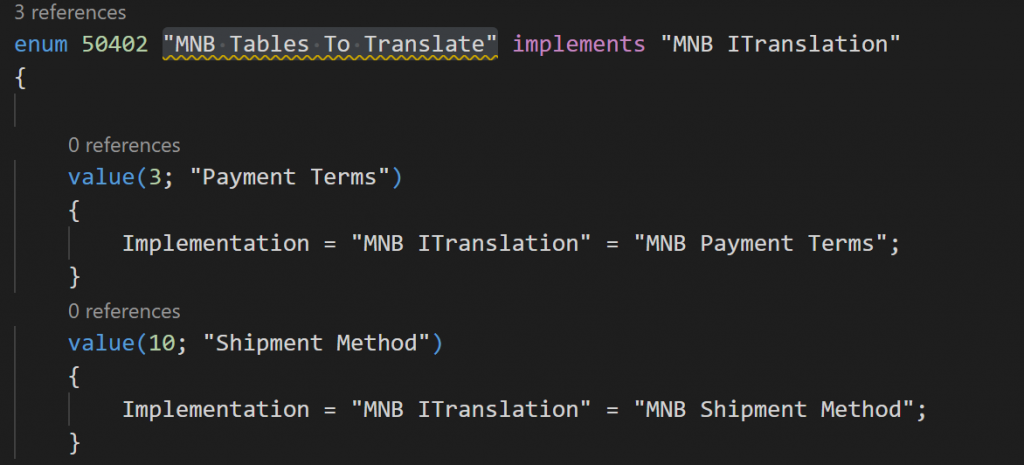
Step 1: Add new Enum Value
Enum MNB Tables To Translate contains all tables with supported translations. Important is that the value should have the same number as the table in the database. For example, the Payment Terms table has number 3 and the Item table has 27.
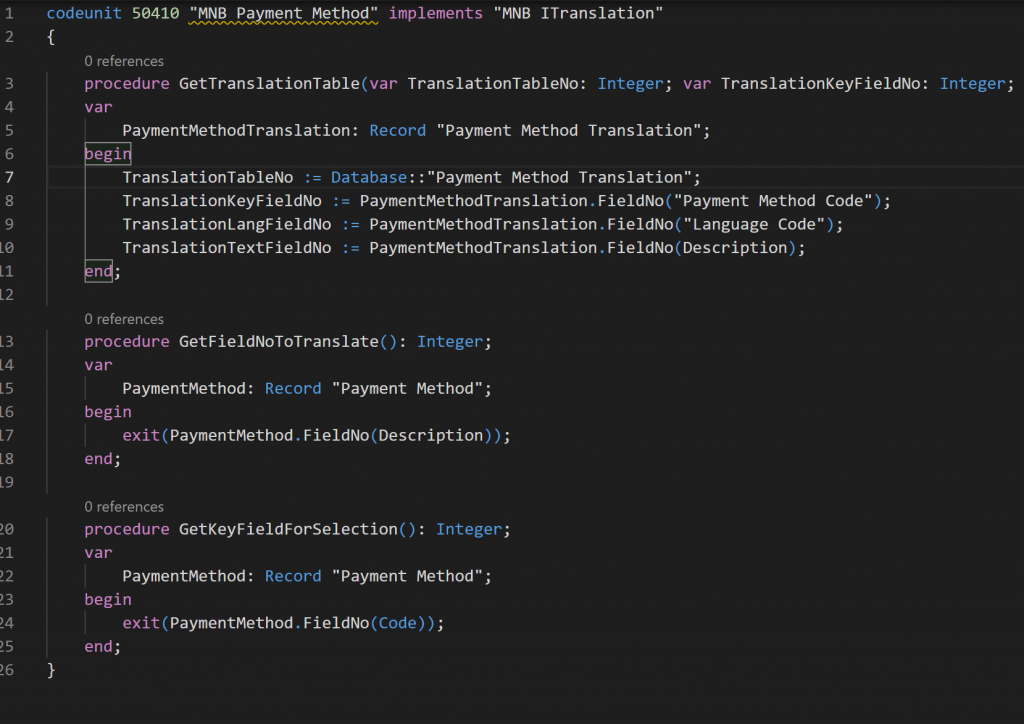
Step 2: Add Codeunit that implements MNB ITranslation interface
In the codeunit, you need to specify which table is responsible for translations (for example Payment Method Translation stores all translations for Payment Methods) and which field is key (for example Payment Method Code field), and the text field that stores translation (for example Description field).
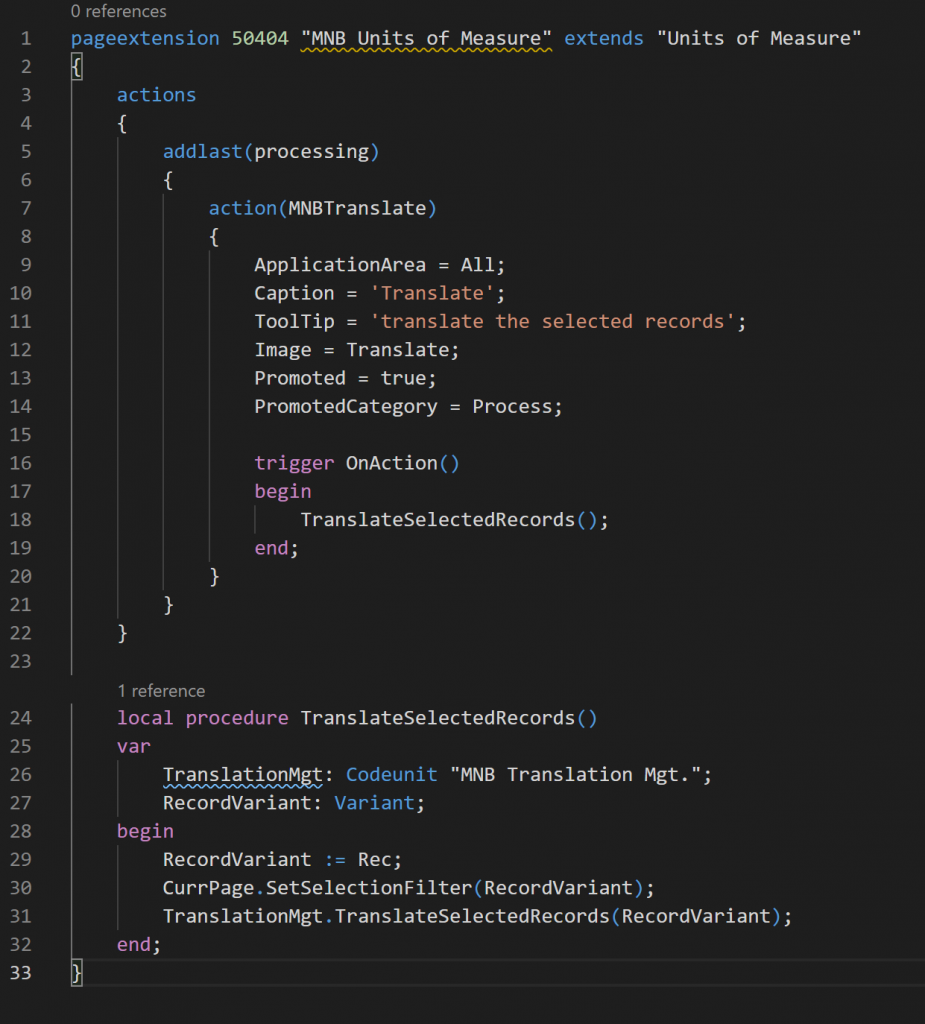
Step 3: Add Page Extension with Action
The action Translate should be visible on the page from which you will do the translation. You can copy one of the existing page extensions. Another option is just to add the action that will run the TranslateSelectedRecords procedure from codeunit TranslationMgt
Summary
I hope this solution is much better than just import data from Excel. I should mention that you can use the solution as you like also in commercial projects. Please also report any issues or bugs directly on the GitHub repository page: https://github.com/mynavblog/Translations
Assisted Setup – Part 2: Basics
Get response from Azure Function in 1,2,3 lines
2 Comments