Automated Builds – Part 9: Using Azure VM
It is quite a while since I posted a series about the automated builds. Those blogs focused on the not complicated pipeline when the agent is self-hosted. If you did not read them, I recommended that you will look at them because a lot of scripts I will reuse in this article. Here is a link to them http://www.mynavblog.com/tag/azure-devops/
Scenario
In my current project, I needed to do a little different way. I needed to set up the Virtual Machine on Azure and run the builds there. But I also wanted to reduce the costs of using the VM. So here you have some bullet points for the scenario:
- I want to use Azure VM as a build server
- I want to start VM machine when needed
- Still, I want to have separate repositories for Tests and real App
- I want to use as much as possible my build scripts which I created previously
- I want to stop VM even if the Build would fail
Setting VM and Azure DevOps
I thought that would be not so easy step. Especially that I never did it before. And it turned out that there is nothing to worry about. Thankfully to Freddy, this is one of the easiest steps. All you need to do is to run this page: https://aka.ms/getbuildagent
And after setting up fields marked below in a few minutes you will have running a virtual machine with all needed to run builds for Business Central.
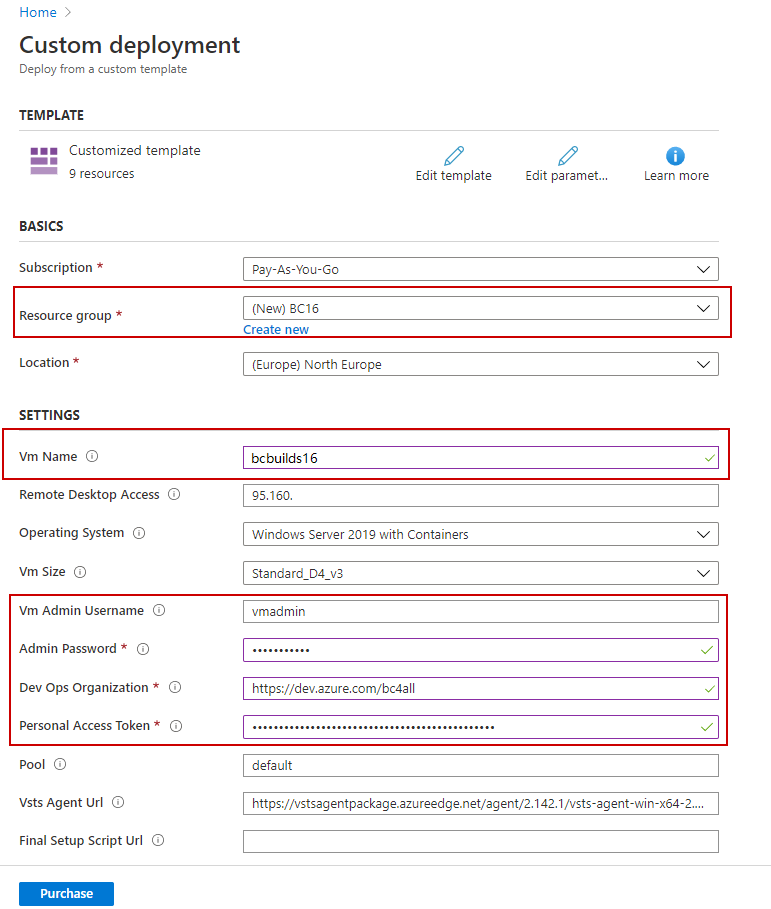
Also, the agent will be installed and will be automatically connected to the Azure DevOps Organization. Small hint if it changes state to offline then just disable it and enable it again.

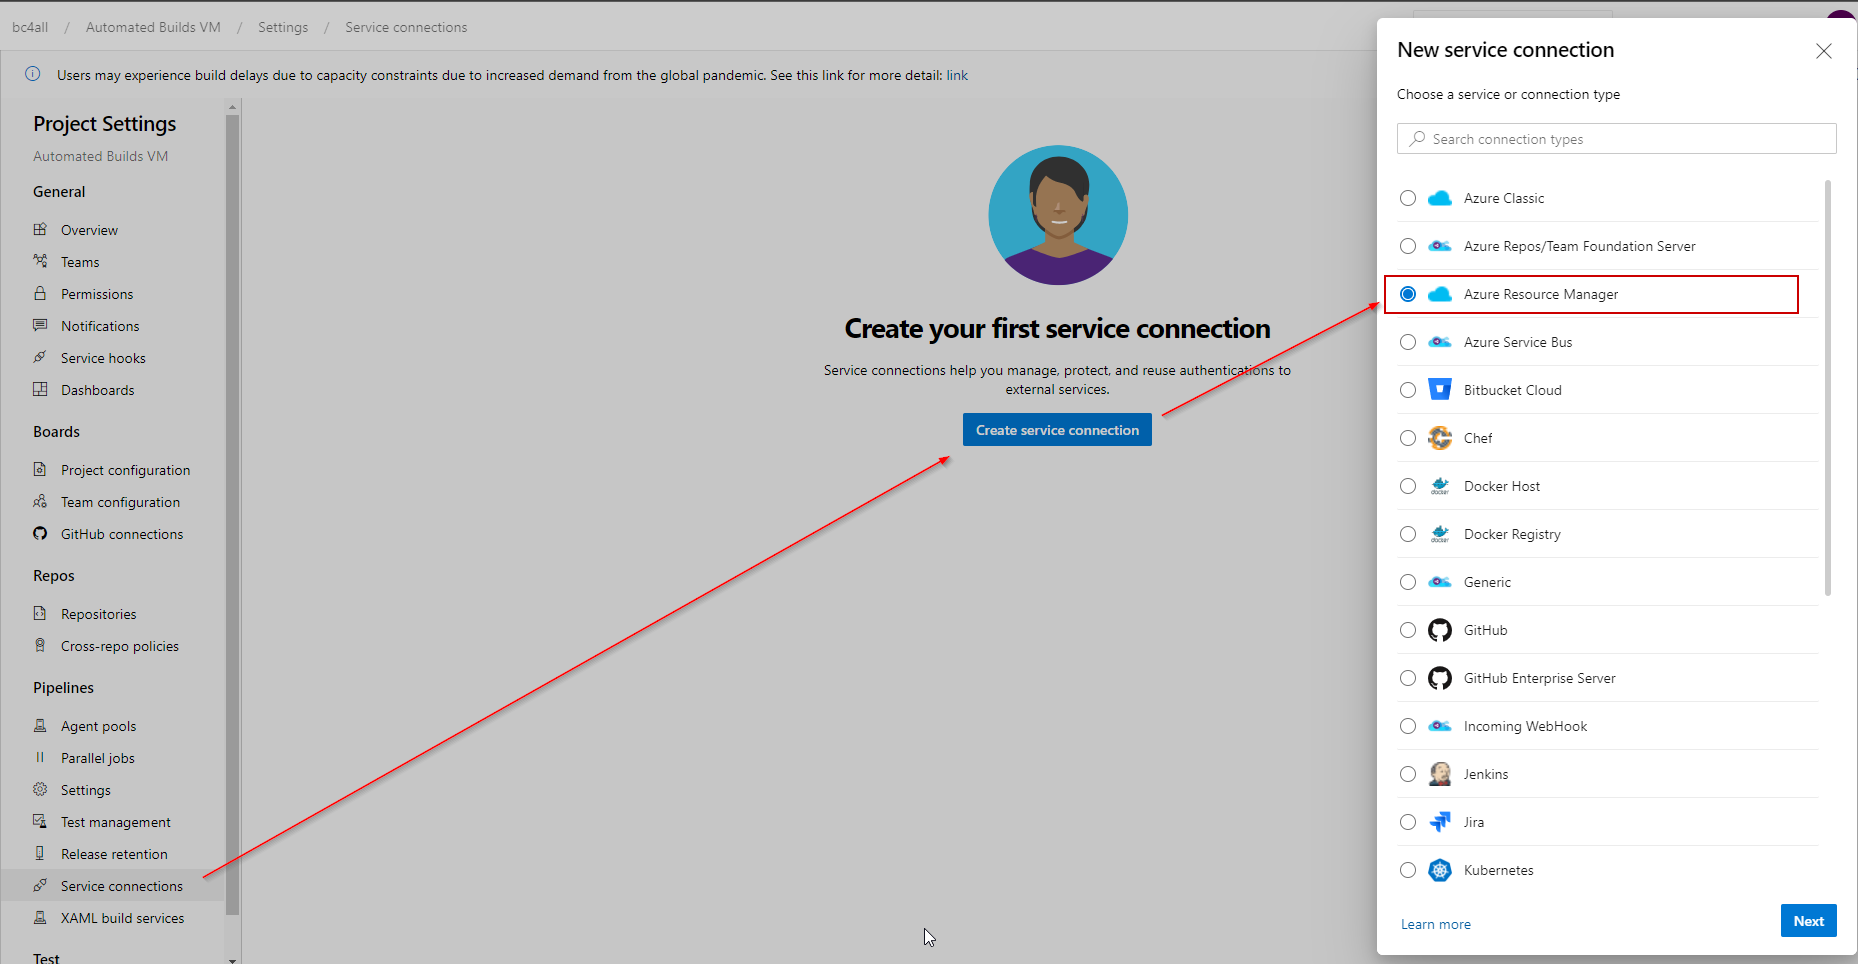
The last step which I needed to do is to connect Azure Subscription with my Azure DevOps Account. For that, I need to set new Service connections and name it BC.

That was quite easy, right? Now you are ready to go with the build VM so the first bullet point is done. It took me less than 10 minutes. Wow.
Starting and Stopping VM
How to start VM automatically? Use the Agent. But for that, we need to have a different agent than this one which we have already on our VM. Remember that, the agent which we set in the previous step works only if VM is running.
This time we will use a hosted agent and YAML file for build pipeline. At this moment I should mention a great session from Kamil Sacek on the last NAVTechDays (https://www.youtube.com/watch?v=eBytbBNCd3w&list=PLI1l3dMI8xlCkFC0S4q8VxPiBt30VQ4w0&index=13&t=0s). He was mentioning the stages in the pipeline, using variables in the YAML directly and splitting the pipeline to more than one file to control it easier. I will try to do the same.
I will have 3 stages in the build pipeline:
- Start Virtual Machine
- Build the Business Central Application
- Stop Virtual Machine
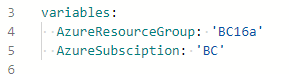
To control the stages and agents which need to be used for each stage I created a file BuildTemplate.yml. At this moment I will focus only on start and stop Virtual machine.
The first part is to declare the variables. I will need Azure Resource Group and Azure Subscription which we set in the previous step
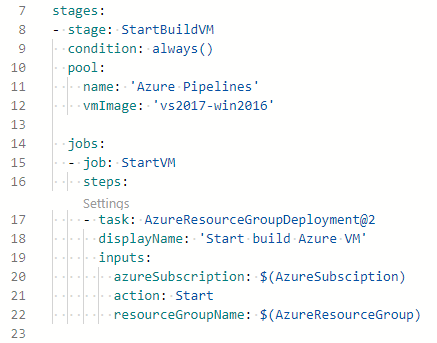
Then the first stage is needed. It will be run by the Azure-hosted agent and will be executed always. For that, we need only one job in the stage.
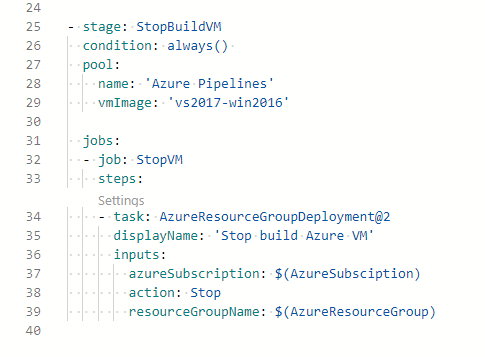
Now I would like to stop the VM and again this step should be executed always – no matter if other steps are failed or not.
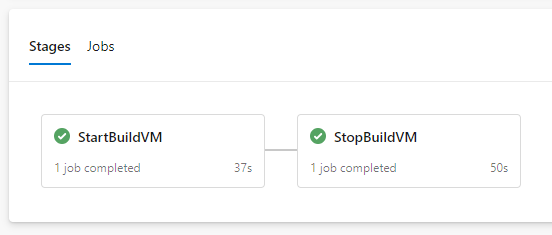
At this moment if you would run the pipeline it will look like below.
Now I need to add the build Business Central Application part. But this you will be able to read in the next article.
The Code at this stage:
trigger: nonevariables:AzureResourceGroup: ‘BC16a’AzureSubsciption: ‘BC’stages:– stage: StartBuildVMcondition: always()pool:name: ‘Azure Pipelines’vmImage: ‘vs2017-win2016’jobs:– job: StartVMsteps:– task: AzureResourceGroupDeployment@2displayName: ‘Start build Azure VM’inputs:azureSubscription: $(AzureSubsciption)action: StartresourceGroupName: $(AzureResourceGroup)– stage: StopBuildVMcondition: always()pool:name: ‘Azure Pipelines’vmImage: ‘vs2017-win2016’jobs:– job: StopVMsteps:– task: AzureResourceGroupDeployment@2displayName: ‘Stop build Azure VM’inputs:azureSubscription: $(AzureSubsciption)action: StopresourceGroupName: $(AzureResourceGroup)

Automated Builds – Part 4: Copy files to container

NAVdevTips 5: CurrPage – yes we can (again)
2 Comments