Automated Builds – Part 7: What to do when code is in more than one repository?
I almost get to the end with the series. Today last point related to building pipelines. Sometimes it is needed to store the solution in different repositories – one for each extension. For example, this can happen when the solution is built from the modules.
What to do then?
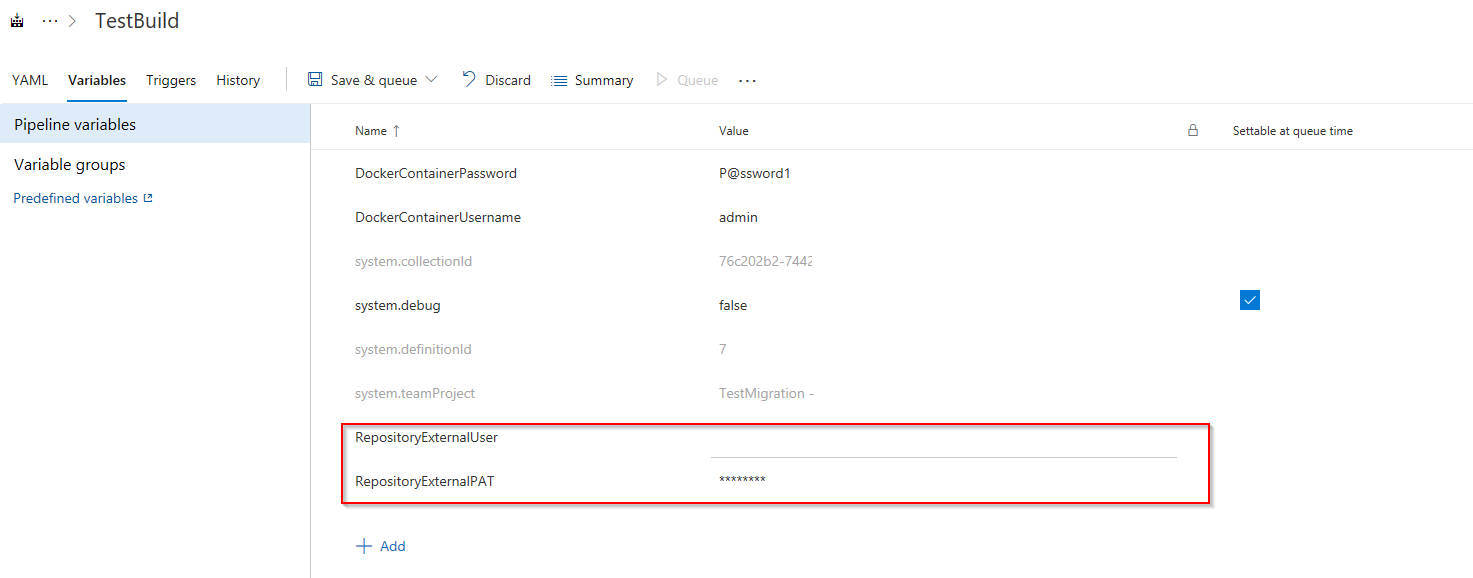
First thing is to have the external user and the PAT which will be used to connect to the repositories. Sounds familiar? If yes – that means you read my last article. The beginning of the step is the same so we will start from adding variables to the pipeline – RepositoryExternalUser and RepositoryExternalPAT.
How to do that you can find here:
http://www.mynavblog.com/2019/08/20/automated-builds-part-6-adding-automated-tests/
The next step is to add our applications to the settings file. This one will be not the same as with tests but very similar.
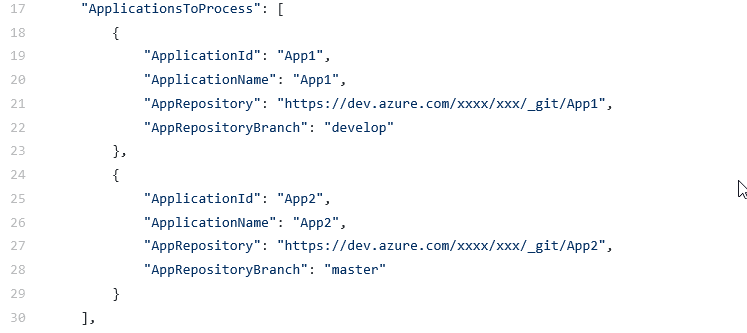
Go to the settings.json file and add new variables in the JSON:
- ApplicationsToProcess – the variable should be declared as an array of the multiple applications descriptions
- ApplicationId: – Unique Application Id which will be used in the PowerShell scripts
- ApplicationName – Name of Application. It is used only for information
- AppRepository – the URL of the repository for the application which should be downloaded
- AppRepositoryBranch – branch which should be used for building the application
Example you can see on the screen.
To process the application the PowerShell script will be needed. The script should connect to the repository and download code. For that, I used the Git function clone. Next, the script should compile and publish the application in the build container.
The example can be download from here:
https://github.com/mynavblog/AzureBuildPipeline/blob/master/BuildScripts/ProcessMultipleApps.ps1
Add steps in the correct order
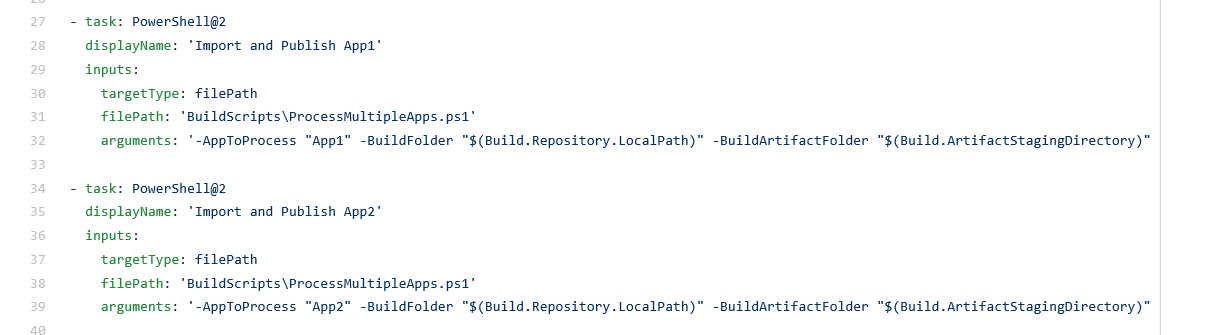
The final step is to add the steps to the YAML file. There should be a new step for each application that needs to be installed on the docker container.
Small tip: change the display name for each to have a clear view during the build which application is processed in the task.
And a bigger tip: remember to put the apps in the correct order. They may depend from each other and if the application will not be published the next one may not be properly compiled.
An example of the code for processing two applications can be found below.
– task: PowerShell@2
displayName: ‘Import and Publish App1’
inputs: targetType: filePath filePath: ‘BuildScripts\ProcessMultipleApps.ps1’
arguments: ‘-AppToProcess “App1” -BuildFolder “$(Build.Repository.LocalPath)” -BuildArtifactFolder “$(Build.ArtifactStagingDirectory)” -RepositoryExternalUser “$(RepositoryEx-ternalUser)” -RepositoryExternalPAT “$(RepositoryExternalPAT)” -credential ([PSCreden-tial]::new(“$(DockerContainerUsername)”, (ConvertTo-SecureString -String “$(DockerContain-erPassword)” -AsPlainText -Force)))’
– task: PowerShell@2
displayName: ‘Import and Publish App2’
inputs: targetType: filePath filePath: ‘BuildScripts\ProcessMultipleApps.ps1’
arguments: ‘-AppToProcess “App2” -BuildFolder “$(Build.Repository.LocalPath)” -BuildArtifactFolder “$(Build.ArtifactStagingDirectory)” -RepositoryExternalUser “$(RepositoryEx-ternalUser)” -RepositoryExternalPAT “$(RepositoryExternalPAT)” -credential ([PSCreden-tial]::new(“$(DockerContainerUsername)”, (ConvertTo-SecureString -String “$(DockerContain-erPassword)” -AsPlainText -Force)))’
YAML Examples
Here you can find the pipeline file for multiple apps:
https://github.com/mynavblog/AzureBuildPipeline/blob/master/BuildScripts/CIMultipleApp.yml
Of course in real life sometimes also automated tests should be performed. This can be achieved in the same as I described in the previous article. Here you can find YAML for full build with automated tests:
https://github.com/mynavblog/AzureBuildPipeline/blob/master/BuildScripts/CIMultipleAppWithTest.yml
Summary
I hope that after those seven articles you get familiar with how to set up builds for most important cases. This is not the last part. Next time I will try to explain how to prepare an easy release pipeline which is related to releasing the built app to the final environment.
Telemetry – Get more info about the users (Part 2)
Tiles – what to do to have nice bricks?