Interface with Power Automate – is it really so easy?
During NAV TechDays 2019 there were a lot of sessions that I would describe as “develop Business Central doing minimum development using AL“. Sounds weird? For me yes… at least at the beginning.
Speakers, such as Arend-Jan Kauffmann (https://www.youtube.com/watch?v=cp848e9WBFs), showed how to connect Business Central with Power Apps or use Power Automate (previously named Flow) and our BC. And my first impression was – noooo way it can be so easy.
So, I decided that I need to try it by myself. I even found out a nice business case to show you the power of Power Automate. Let’s assume that you use on your project Azure DevOps to register all issues. Your customer would like to get the list of all closed issues together with the Invoice which you issue in Business Central. For that, you need to have an interface between Azure DevOps and Business Central. But How?
Create API Page in AL
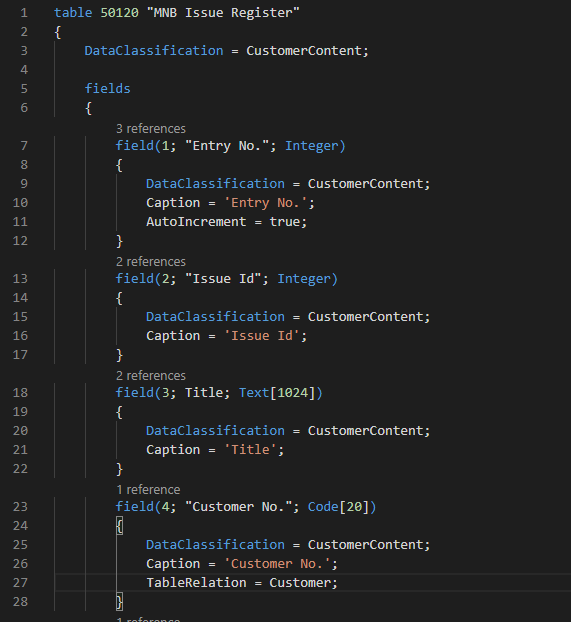
For that, I will need small development on the AL side – but really small. First, I created a table (and page) called Issue Register. It has the id, subject and close date of the issue.
The next object which is needed is the page type API. This kind of page you can create with the standard snippet. I needed to specify a few parameters in the object. Such as APIPublisher, APIGroup, APIVersion. Those parameters are needed for the connector to the custom API.
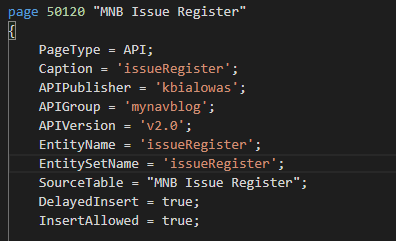
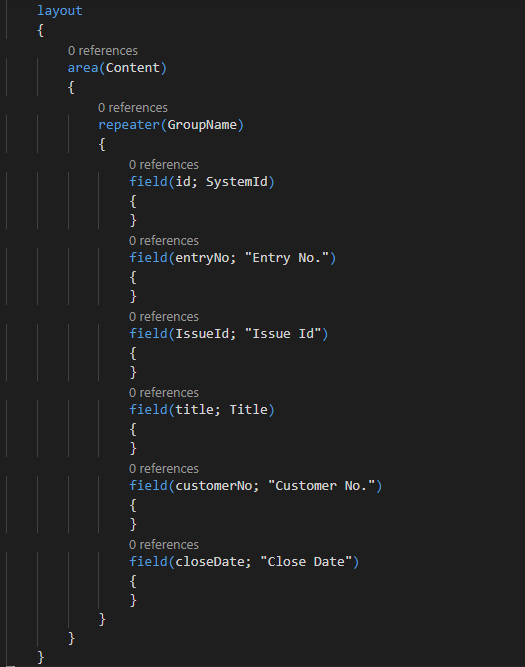
I added all fields which are in the table to the API page. There is one thing that you need to remember when adding the fields to the API page – the name of the controls cannot contain the spaces.
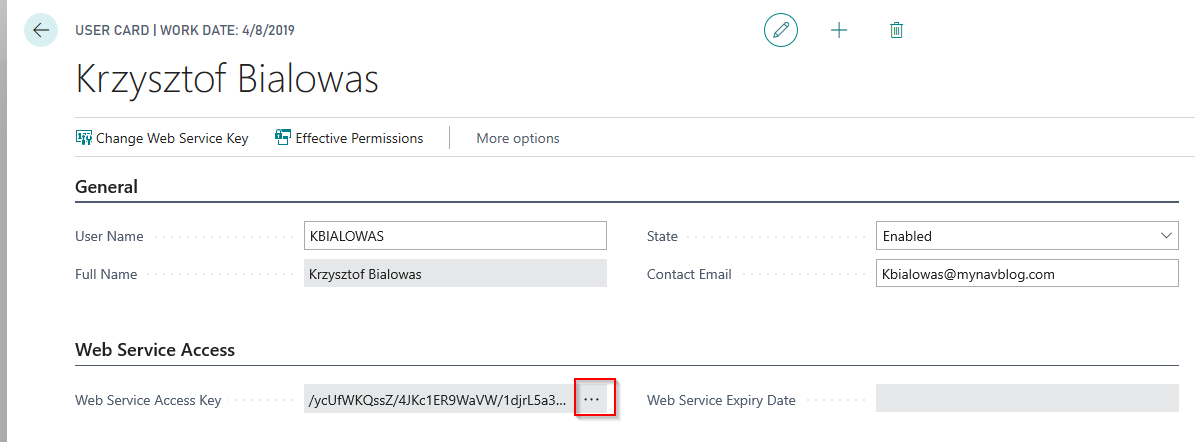
When you will publish an extension to your sandbox API will be visible. To connect to the API you will first need the Web Service Key which can be generated from User Card.
More information how to connect to API to or from the sandbox and production environment you can find on Microsoft Docs page here – https://docs.microsoft.com/en-us/dynamics-nav/api-reference/v1.0/endpoints-apis-for-dynamics
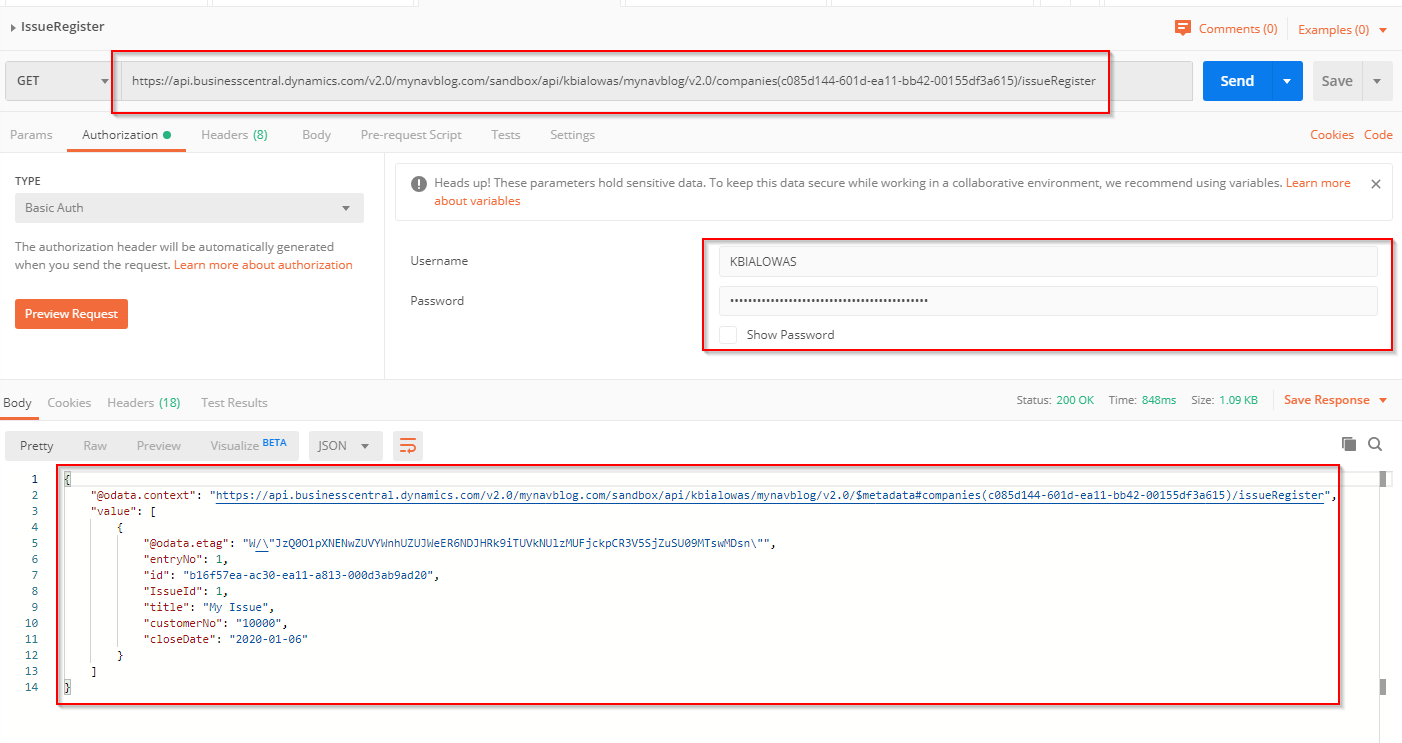
To check if all data is shown correctly you can use Postman (https://www.getpostman.com) and create a new request for address:
https://api.businesscentral.dynamics.com/v2.0/<DomainName>/sandbox/api/<APIPublisher>/<APIGroup> /<APIVersion>/companies(<ID of your company>)/<APIEntitySetName>
Your company ID you can find running the request in Postman:
https://api.businesscentral.dynamics.com/v2.0/<DomainName>/sandbox/api/beta/companies
For my example, the address will look similar to below Postman example.
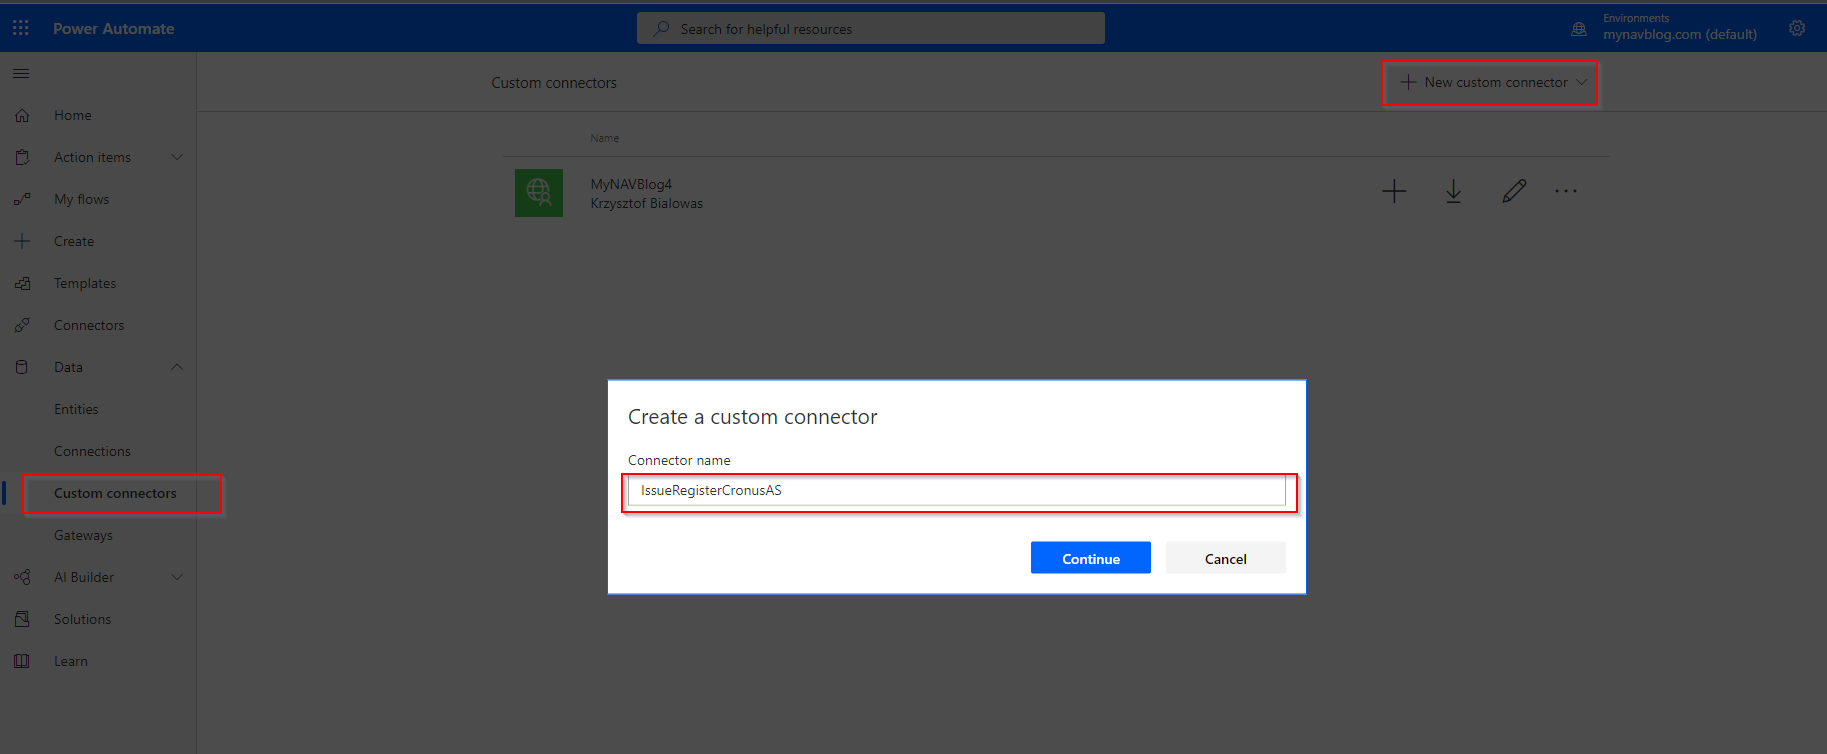
Power Automate – Custom Connector
For the interface, I will use Power Automate. Unfortunately, I cannot use the standard connector because it only covers build-in APIs. Therefore, I will create new Custom Connector.
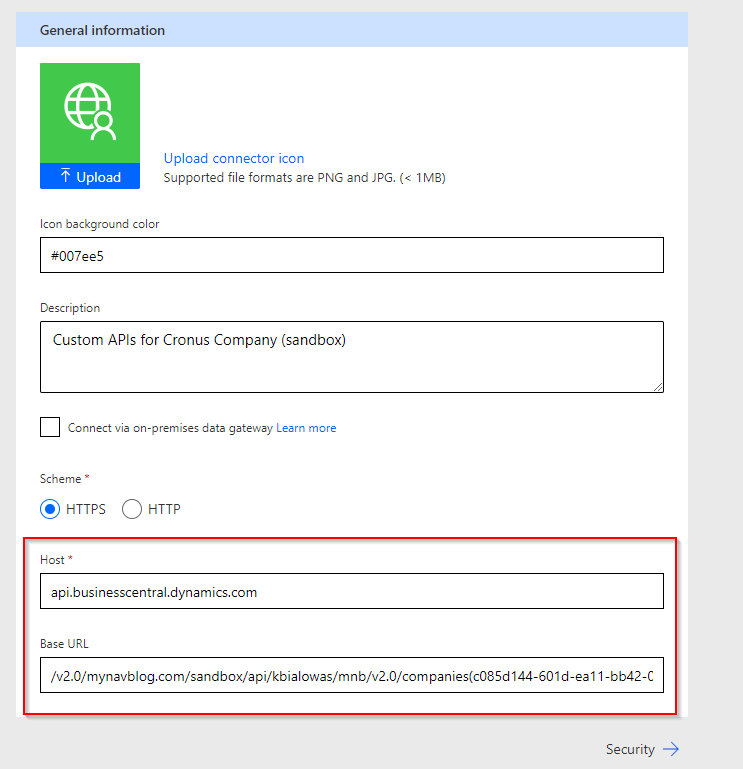
In the first step, I need to specify the description, host and the base URL for the APIs. My connector can have multiple actions and triggers, but all will be for one company. Therefore, in the host, I specified the address of the APIs – api.businesscentral.dynamics.com, and in the base URL, I put address without my API name but with the company id.
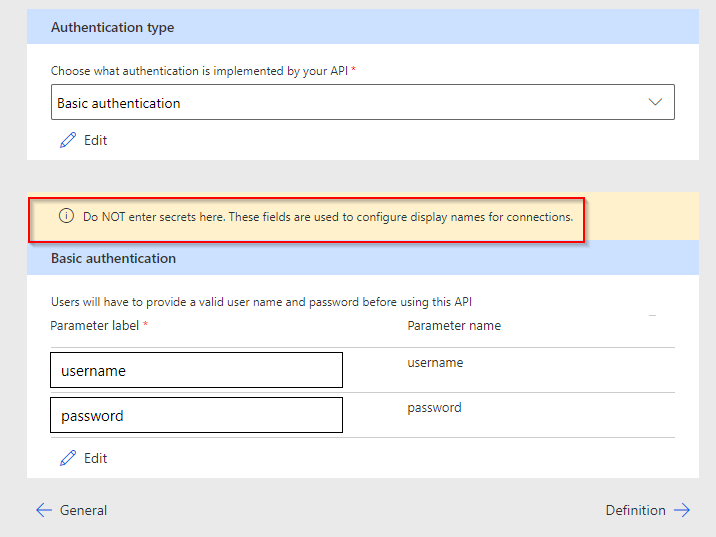
The next step describes what is the authentication used by the API. For the sandbox, it is Basic Authentication. Remember that in this step you put only captions (not values) for username and password.
In the third step, I added the action which is responsible for creating the Issue Register Entries. It will be type POST – means it will insert the record to Business Central.
As an URL I specified only the API name – issueRegister (I do not need to specify the whole URL because it will be taken from my Base URL from the previous step).
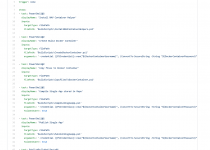
In the body of the request, I put JSON which I copied from the Postman – with all fields which can be found in the API.
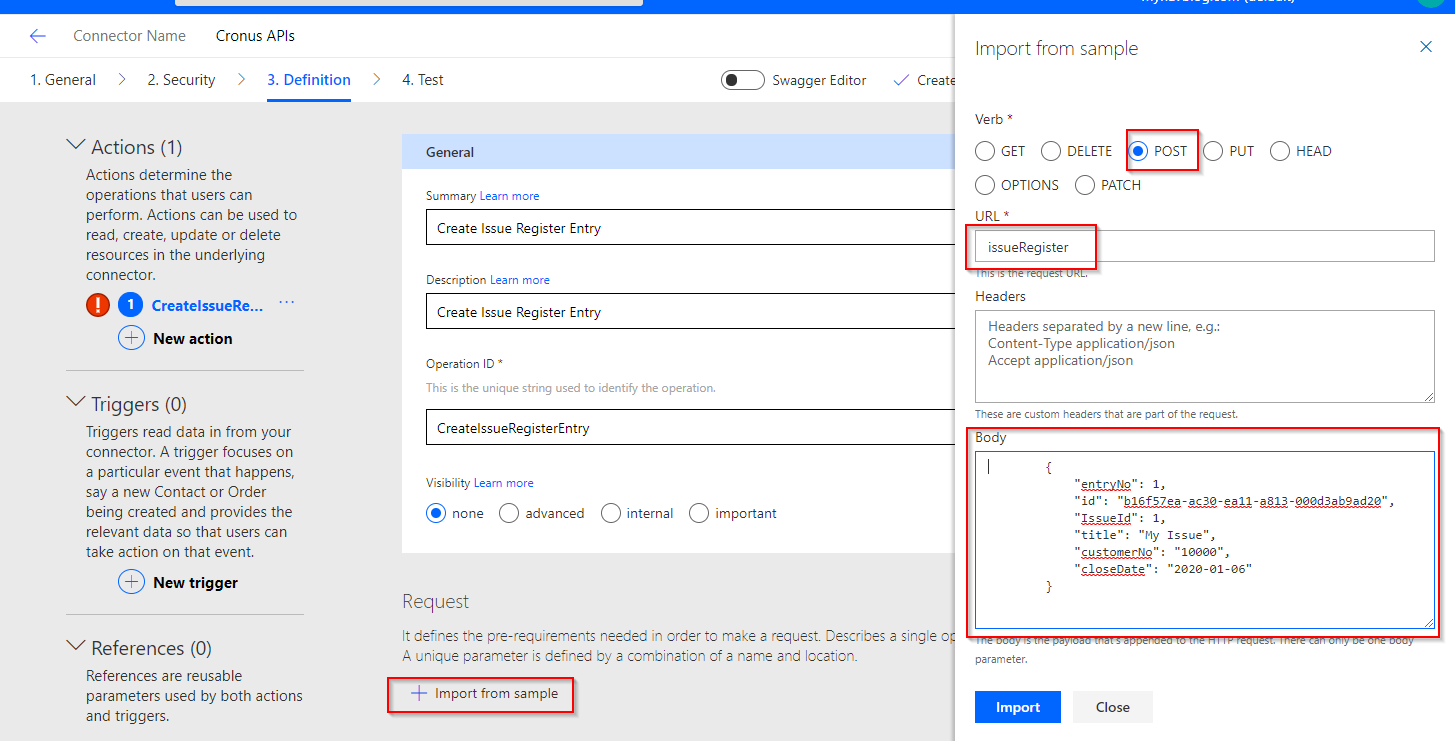
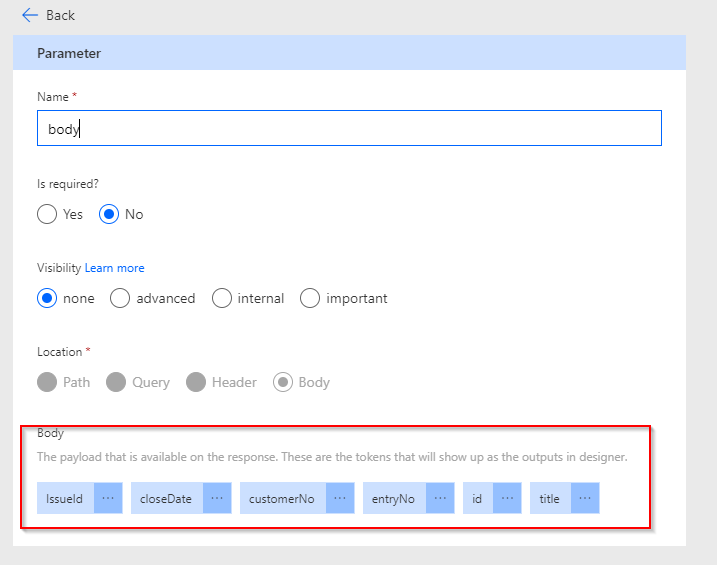
Power Automate will automatically recognize all fields in the API based on JSON. You can see them when you click edit Body.
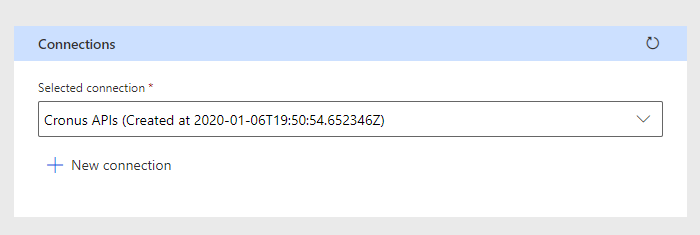
In the last step, I can test the connector. First, I save it and then create a connection with my username and password.
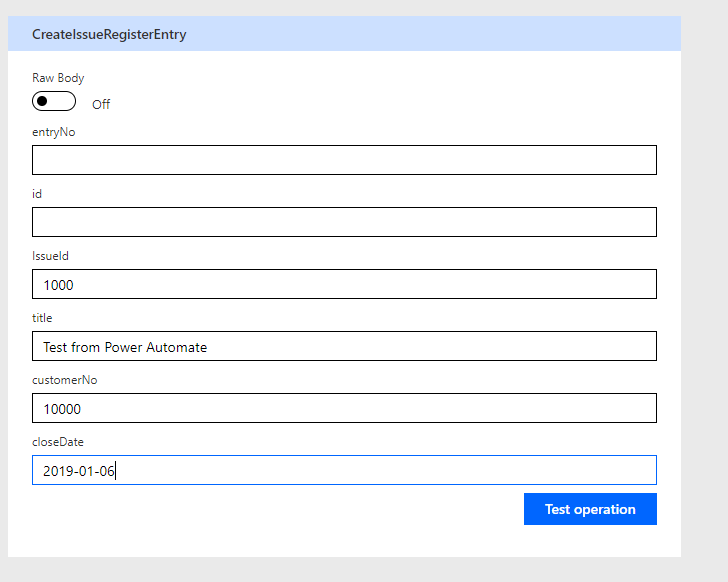
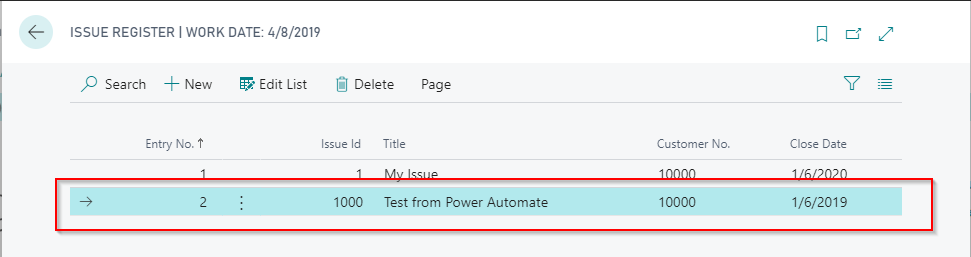
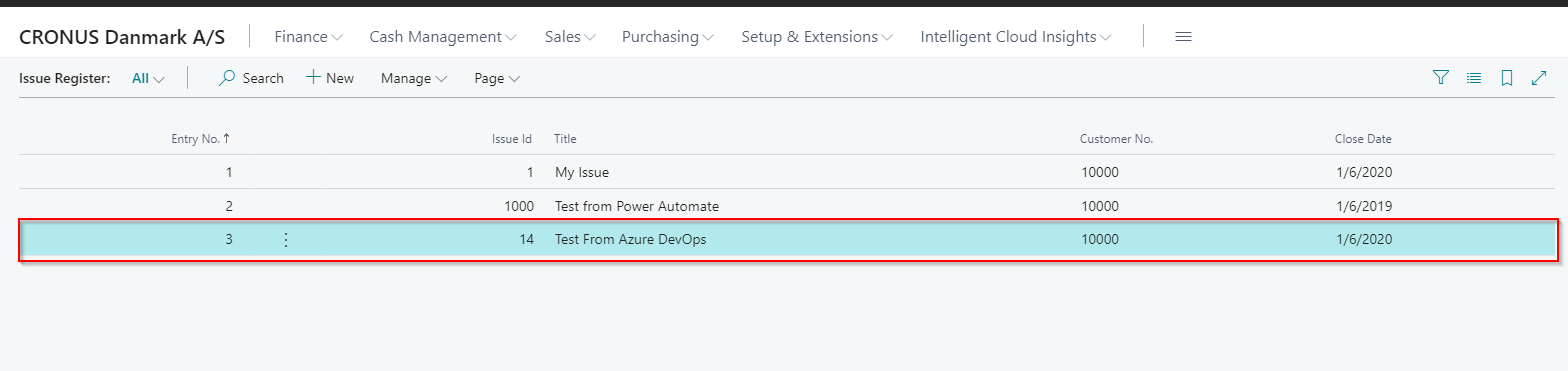
As a result, in Business Central I can see a new record.
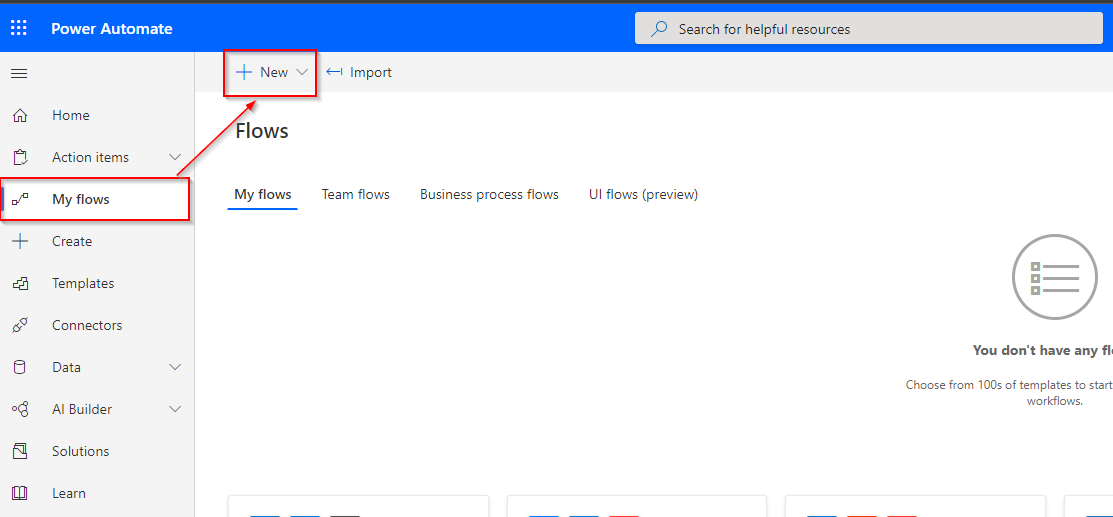
Power Automate – My Flow
Now I am ready to create my automated flow which will have two steps. One will be a trigger and second which will be an action.
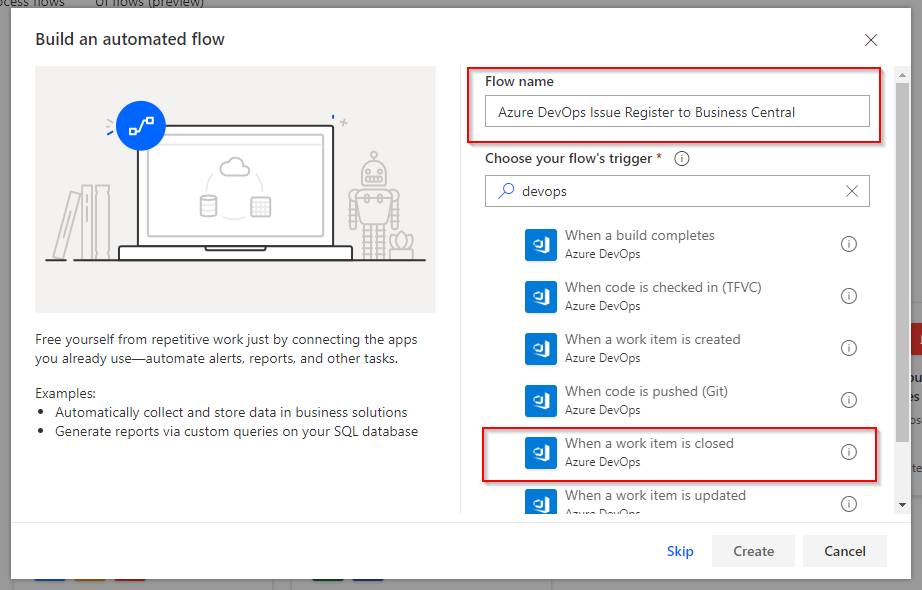
In the window, I need to specify the name and choose the trigger. I will use the trigger from Azure DevOps when the work item is closed.
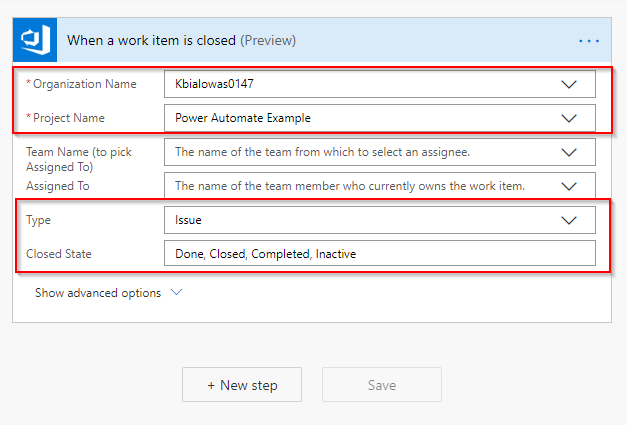
I need to tell Power Automate what my organization is, project and the type of the work item which should trigger the action.
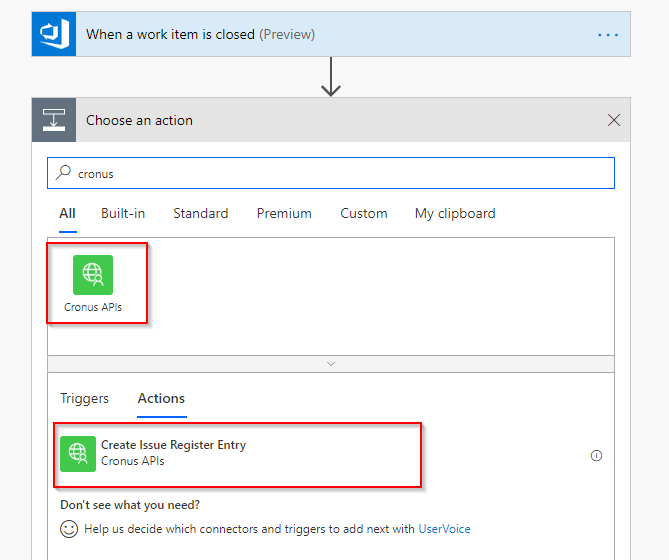
Then I need to add the action which will create the record in Business Central. For that, I can search for the created custom connector – Cronus APIs. As you can see below, I can see all triggers and actions which are available in the connector.
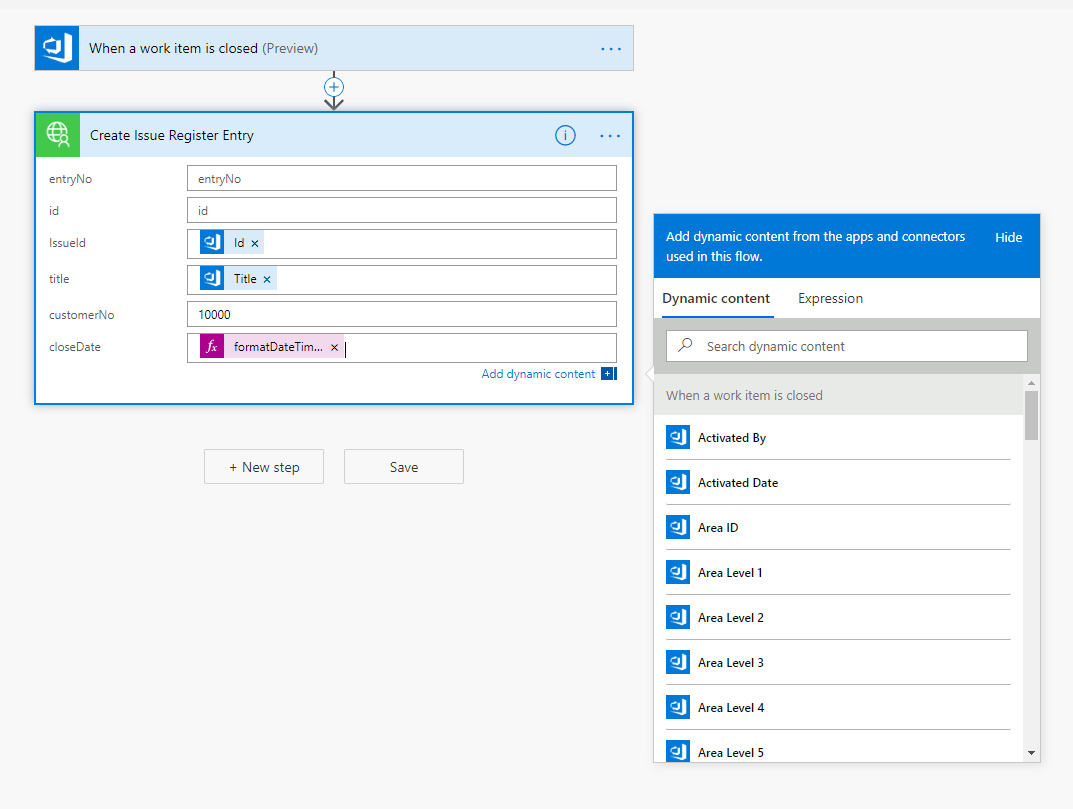
In the next step, I can choose how fields from Azure DevOps API will be mapped to the Issue Register API fields. I can also put some default values – such as Customer No. or, like with the Close Date field I can put the formula which will format the DateTime to date.
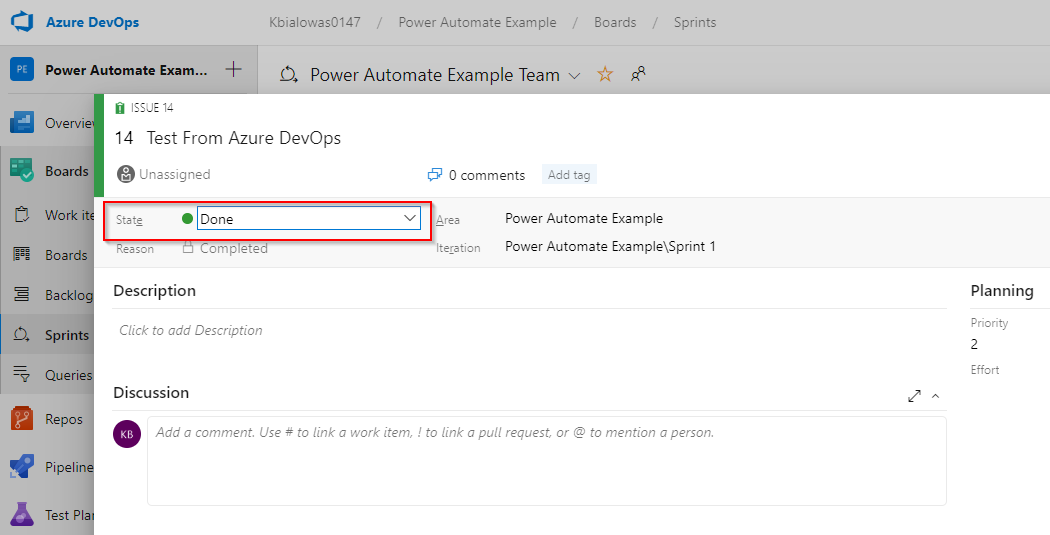
I can test the interface right away. When I closed the Issue in Azure DevOps It automatically has been inserted into Business Central.
Summary
In the past creating such an interface will take me quite a lot of time. Now it is easy to set up. However, it does not work which can be done by a consultant in my opinion. This still needs quite a lot of technical knowledge. Doing that first time I had some problems. For example, with the date and do proper formatting.
But I must say that this is a great way to handle interfaces. There is a lot of standard triggers and actions which you can use. For some customization, it is also not very hard to get it working.
Examples
On my GitHub you can find the objects which I used for this quick interface: https://github.com/mynavblog/Examples/tree/master/IssueRegisterExample
Automated Builds – Part 5: Compile and Publish single Extension

#NAVdevTips 13: AL without Visual Studio Code
One Comment