Assisted Setup – Part 3: Wizard or guide
In the last article in this series, I showed how to create an assisted setup and add all the necessary information such as adding a video or help link. Now let’s extend it and to something more. In this article, I will create a wizard and will add it to the assisted setup.
Creating wizards – and name them guides
In the past, we called the pages like below a wizard page. And we still do, however, I see that now the word wizard (at least in the “front end” of Business Central) has been replaced with word guide. So good to know this when talking to consultants and end-users.
The structure
The guides in Business Central almost always have the same structure. The exception is the data migration guides but those I will describe in the next articles.
I will try to explain what I have in mind on one of the standard guides – Set up my company.
There is always the starting page that informs what would be done in the guide and always there is the phrase “Let’s go!” which should trigger us to do some action – in this case, click the Next button.
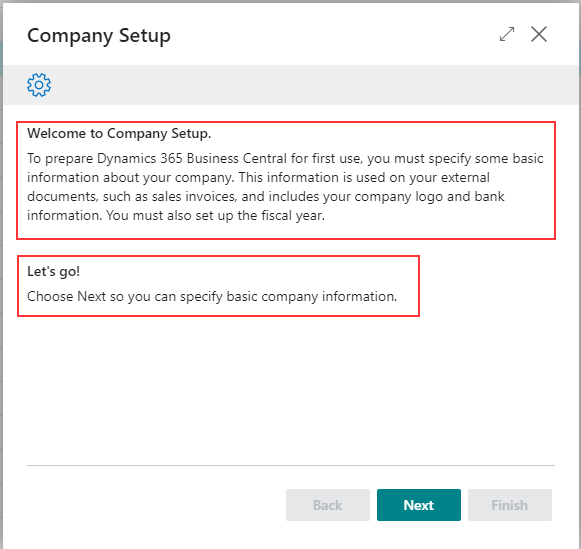
Note that the buttons which are not needed at this moment (in this case Finish and Back) are disabled but still visible.
In the next step (or steps depends on the guide) user needs to fill the most important data for the module setup. It is good to have more than one step and just group the setups in the functional area. Always there should be some instruction that explains what will be done on the page.

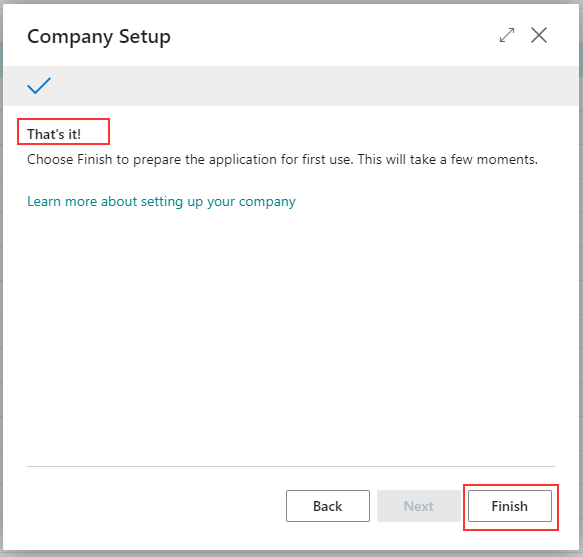
The last step of the guide is almost always the same. It has a magical sentence “That’s it!” which brings the user to the end of the setup. The user needs to click the Finish button.
And here is one difference to what we are used to. The wizards/guides are based on a temporary table and the pattern is that the data from the guide is saved only when the user clicks Finish. Otherwise, the data will not be saved, and someone will need to start setting up from the beginning.
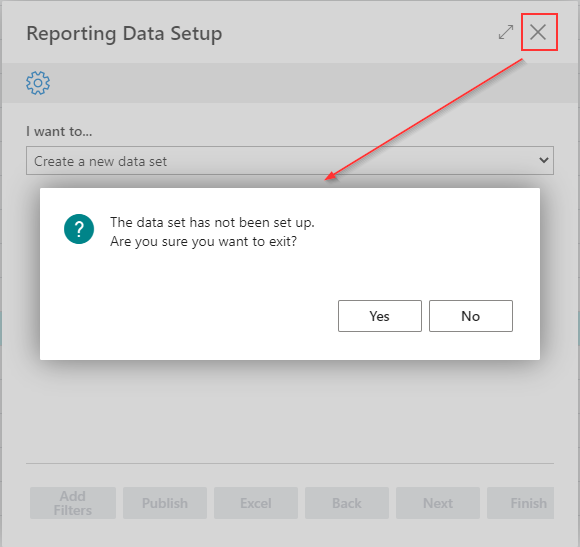
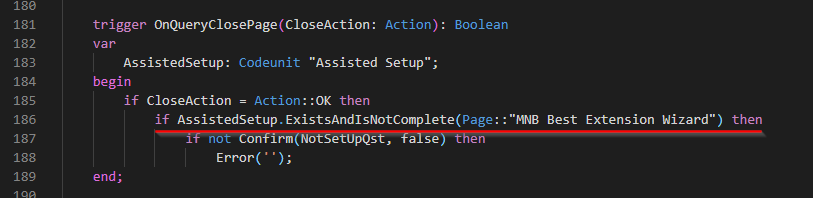
If the user will try to click the exit, then there will be a confirmation dialog if you want to exit because data is not set.
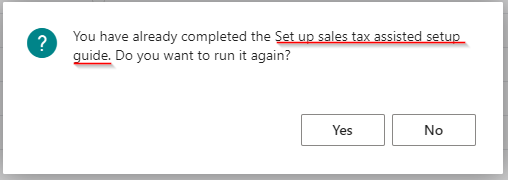
And here was a small surprise for me. The confirm dialog is shown only if the setup does not exist in the database yet and is not completed. If the setup is marked in the Assisted Setup as completed, then when the user would click exit no message will be shown and data would not be saved.
How to develop. Where to start?
It is quite simple. The easiest way is to use a snippet from Waldo’s extension. Although it would need some adjustments, it is the best way to start.

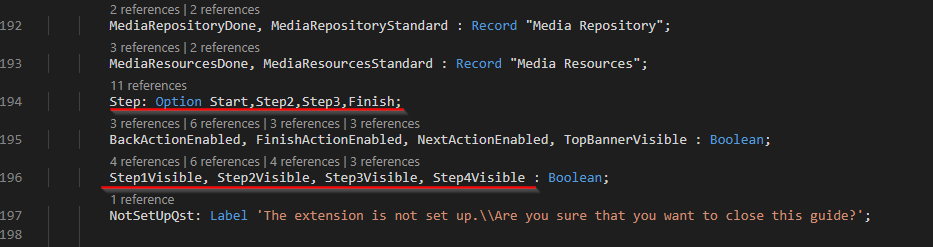
In my example, I would like to have 4 steps instead of 3 which are in the snippet. So first would be the “Let’s go!” page, the second and the third step would be real setup steps and the last step would be the “That’s it!” step.
For that, I little reorganized the variables and I added one additional value with the step to the option (in this case there is no point to use enums). Also, I added a new variable to be able to control if the step controls are visible or not.
I will not write what I have in the first step – you can see that in the example on GitHub. Here I did not do any changes.
However, to properly show the steps with fields, I added the group which is my container for the whole fields and groups in that step. The effect is that for each step with the data I have a similar section as below.
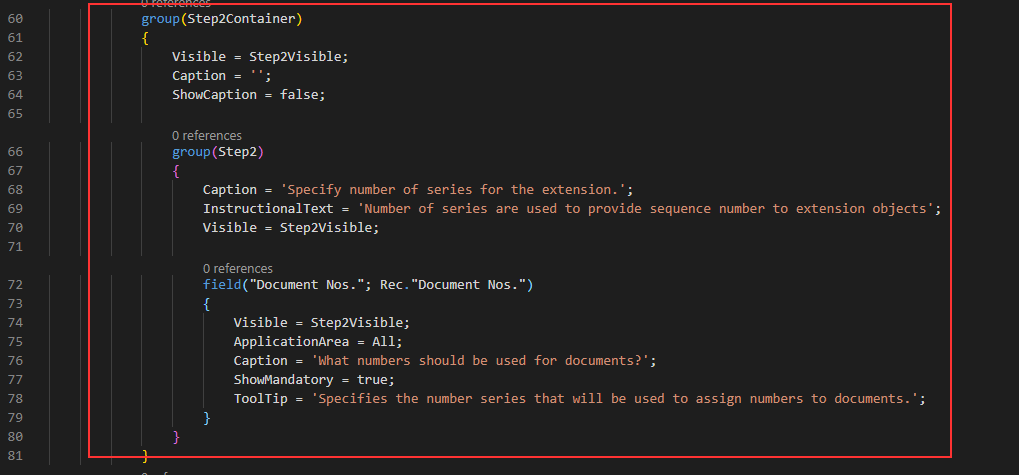
Here are a few notes. The first one is that all the fields in the section should be visible only when the variable Step(X)Visible is set to true. This is control in procedure EnableControls().
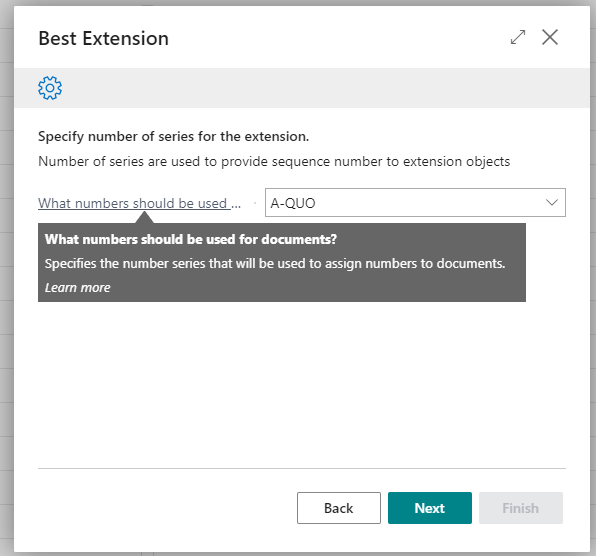
The second is that I overwrote the captions of the fields. This is on purpose because I want to tell or ask the user something which he/she can reply very easily. It is like a consultant would ask “Ok… What numbers you would like to have for Documents?” or “Do you think it is the best extension ever?”.
The effect of this you can see below.
The last thing which needs to be added to the guide is closing and saving the guide. For that, I added the trigger OnQueryClosePage(). In the trigger, there is a check if the setup already is completed or not. If not then the question is shown otherwise the guide is closed.
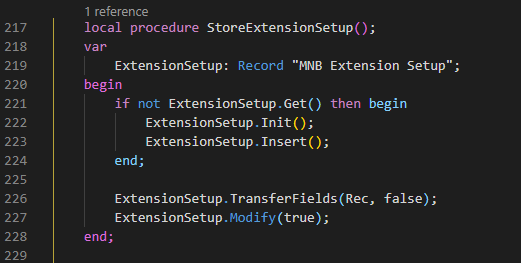
To save the setup, after clicking the Finish button, the function StoreExtensionSetup() is triggered. In it the setup is created if not exist and all fields are transferred from the temporary table to the regular table.
Last step. Add guide to the Assisted Setup
The last step is to add the guide to the assisted setup page. How to do it I hope you already know – but if not then you should back to the previous article in the series.
The whole code from this article you can find in the GitHub repository here.
Common BCContainerHelper Commands in one place
One Comment