#BCdevTips 7: Your own playground
In my last post I wrote how to get the trail version of Business Central. Now I would like to guide you step by step how to setup your own sandbox on the local machine.
Very good tutorial you can find on Microsoft Docs here: https://docs.microsoft.com/en-us/dynamics365/business-central/dev-itpro/developer/devenv-get-started-container-sandbox
However for someone who never used Docker some additional explanation information which you will find below can be very helpful. So let’s go step by step.
Step 1 – Install Docker
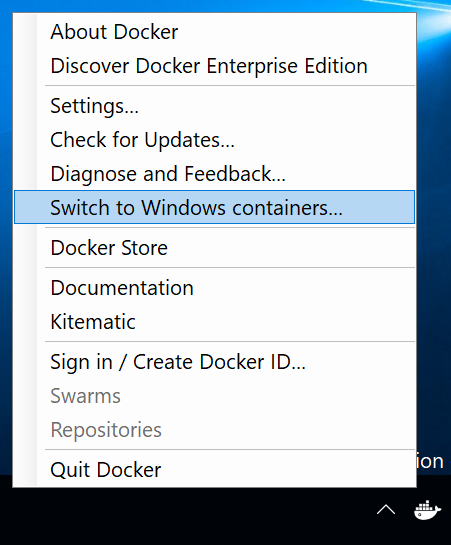
Go to page https://store.docker.com/editions/community/docker-ce-desktop-windows and on right side click Get Docker button. After installation click Docker in Tray Icons and Switch to Windows contrainers… Remember that you need to restart computer. When your computer will be again alive click the same action to finally switch to Windows containers (action will change to name Switch to Linux containers…).
Step 2 – Get the PowerShell script from Business Central Trial
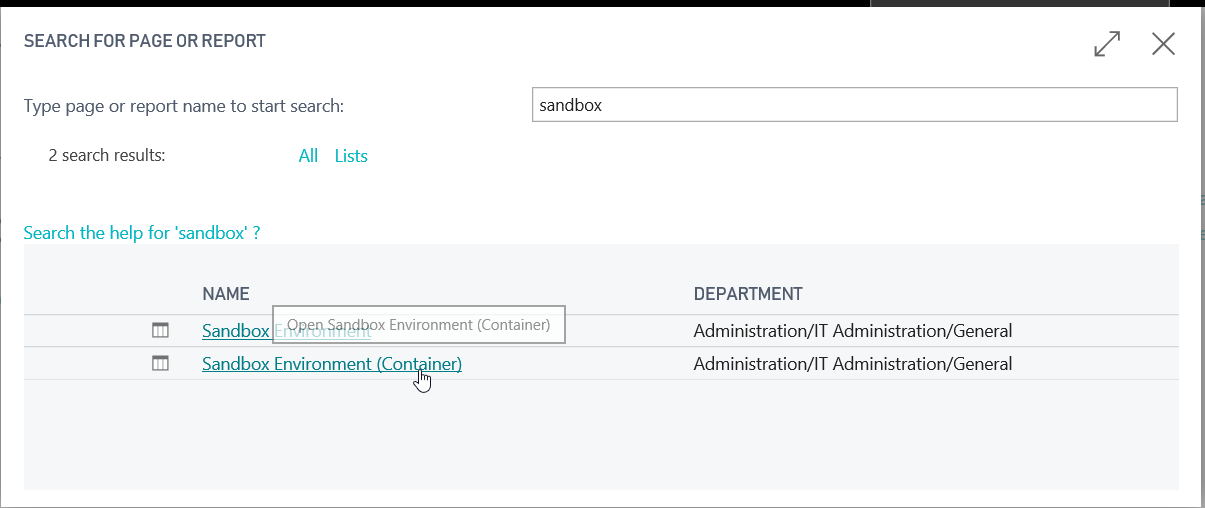
If you not have yet trial version of Dynamics 365 Business Central then check my last post. After getting access type in Search Sandbox and choose Sandbox Environment (container).
Choose option to Host Locally your Sandbox and save the PowerShell Script CreateBCSandbox.ps1 to your computer.
Step 3 – Change CreateBCSandbox.ps1 PowerShell Script
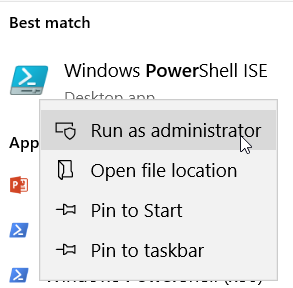
Go to PowerShell ISE and open it as administrator.
Open the script which we got from previous point. Check below things before running the script.
Set accept eula to true:
$accept_eula = $true
Add name to your container for example:
$containername = ‘MyBizCentralApp’
Check Docker Image:
for example: $navdockerimage = ‘microsoft/dynamics-nav:12.0.21309.0-findk’
you can find the latest image here: https://hub.docker.com/r/microsoft/dynamics-nav/tags/
Step 4 – Run CreateBCSandbox.ps1 PowerShell Script
Note: If you never run the PowerShell Scripts on your computer before, you could have error that you are not allowed to run PowerShell Scripts due to permission issue. If so you either need to contact your administrator or you can remove Execution Policies by running new script with below line:
Set-ExecutionPolicy Unrestricted
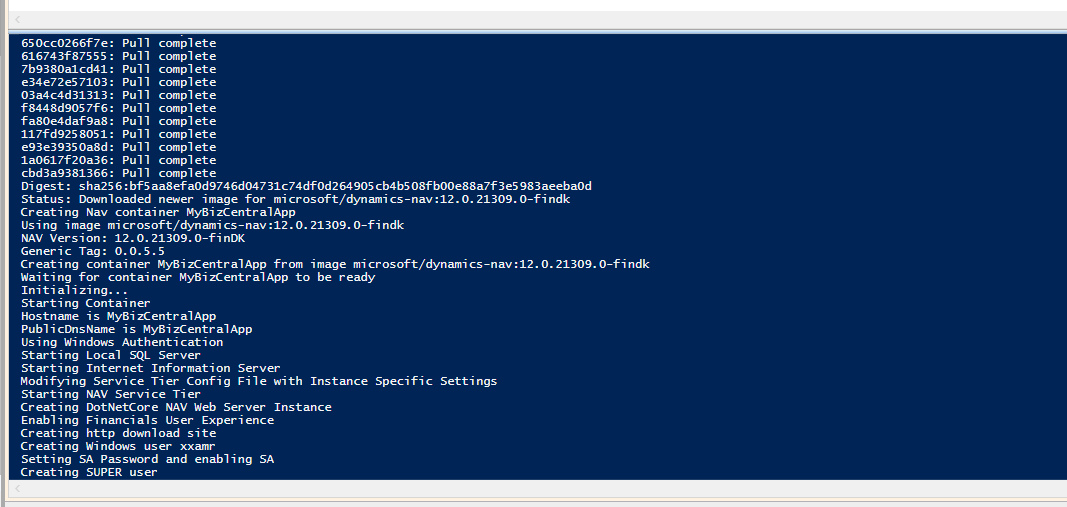
First thing which you need to do after Run script (F5) CreateBCSandbox.ps1 is to put your credentials. After that script will be executed – it will take around 20-25 minutes to run it.
Step 5 – Check if all is ok
When script will finish you will see message that container had benn successfully created.
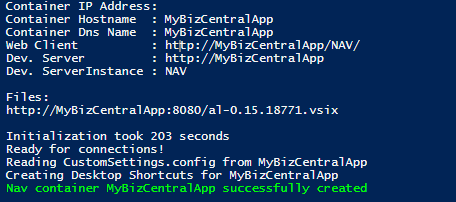
On your desktop you should find new icons for Web Client, Windows Client and CSIDE Environment.
![]()
Step 6 – Setting up the Visual Studio Code
For this step you need first install Visual Studio Code if you do not have it already. You can find it here: https://code.visualstudio.com/
Step 6.1 – Install AL Language Extension
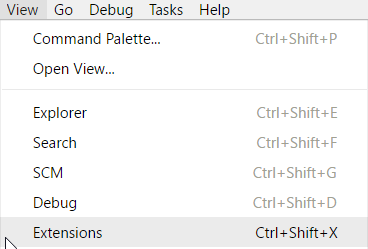
Go to view and click Extensions.
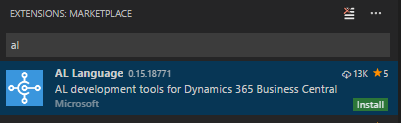
Type AL. You will find AL Language published by Microsoft. Click install. After it will be installed please reload program.
Step 6.2 – Creating new project
In Visual Studio Code type:
ALT+A then ALT+L
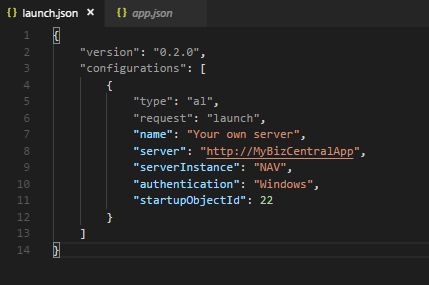
your new project will be created. Open launch.json file and set server (from Dev. Server in step 5), serverInstance (from Dev. ServerInstance in step 5) and authentication. For example:
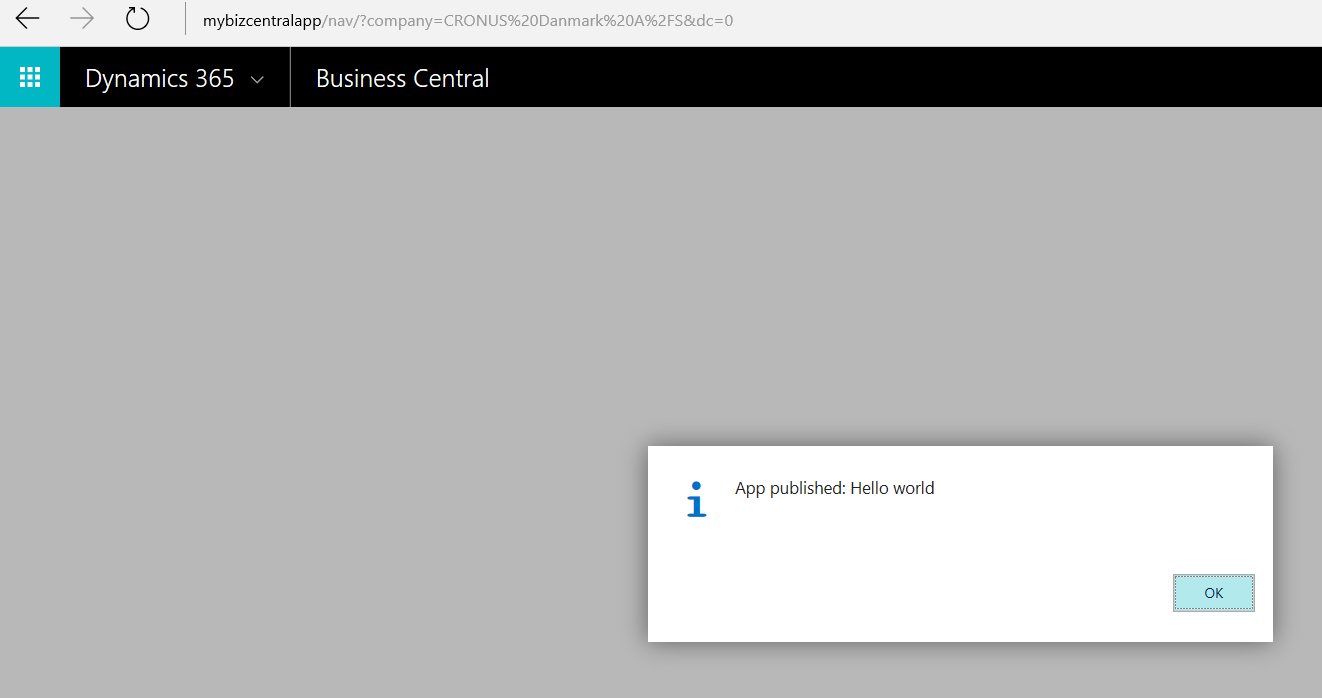
Step 6.2 – Run project to check setup
You are now ready to start development and use your sandbox. Just click Ctrl+F5 to see results of our extension
Step 7 – Have fun!!!
Telemetry – Get more info about the users (Part 2)
Automated Builds – Part 8: Release Pipeline
I don’t see any Production and/or service module yet in these latest Builds?
Hi Jan,
Freddy wrote blog about it. https://blogs.msdn.microsoft.com/freddyk/2018/04/12/enabling-premium-experience-in-business-central-sandbox-containers/
This work as a charm. Thanks for sharing 🙂
Best regards from Denmark……