Automated Builds – Part 6: Adding automated tests
I get to the point in the series where I have an app published to the build container. However, I am missing a very important step – testing of the application. Let’s change that and add to the pipeline the automated tests.
What is the tricky part of this step? First of all, the automated tests should be in separated extension – means it is more convenient to store them in a separate repository. Second, that tests should be run automatically, therefore, it is needed to create the install Codeunit for the test application.
Receive Test Extension Repository
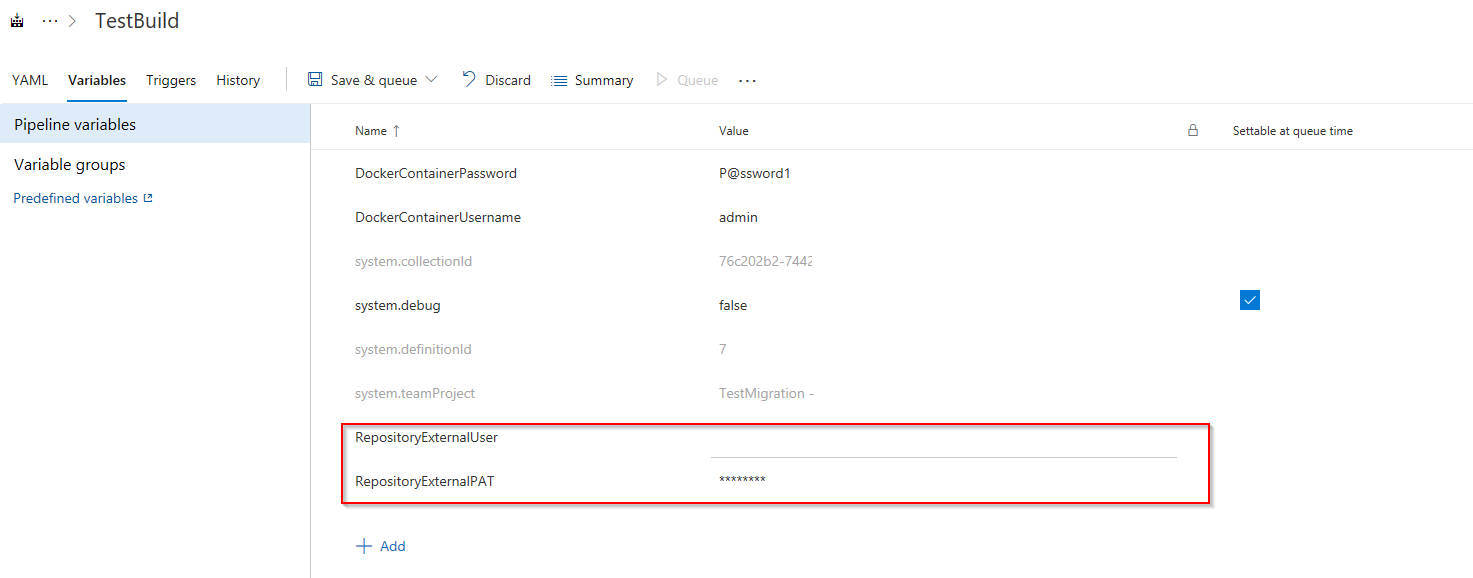
To receive the code for the automated tests from a different repository, the first step is to add new variables to the pipeline which will store the credentials to access the repository. For that, I need to add new variables to the pipeline.
- RepositoryExternalUser – variable will store username which will connect to external repositories to download the code
- RepositoryExternalPAT – variable will store PAT for the username which will connect to external repositories to download the code
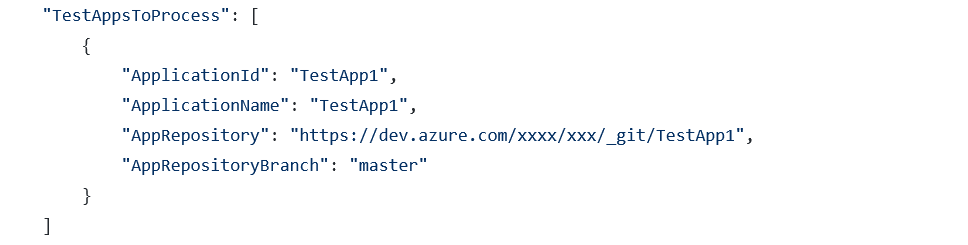
Then to the settings file (settings.json), I need to add information related to the automated test application. We need at least the Application Name, the repository (URL) where it is stored and the Git Branch from which the code should be downloaded.
Go to the settings.json file and add new variables in the JSON:
TestAppsToProcess – the variable should be declared as an array of the multiple test applications’ descriptions. This will allow having as many testing application as needed.
- ApplicationId: – Unique Test Application Id which will be used in the PowerShell scripts
- ApplicationName – Name of Test Application (it can be the same as in AL Project). It is used only for information
- AppRepository – the URL of the repository for the test application which should be downloaded
- AppRepositoryBranch – branch which should be used for building the test application
The example in the settings files look like this
Now we need the PowerShell script which will clone Git repository, compile and publish the test application to the build container. The working example you can find here:
https://github.com/mynavblog/AzureBuildPipeline/blob/master/BuildScripts/ProcessTestApps.ps1
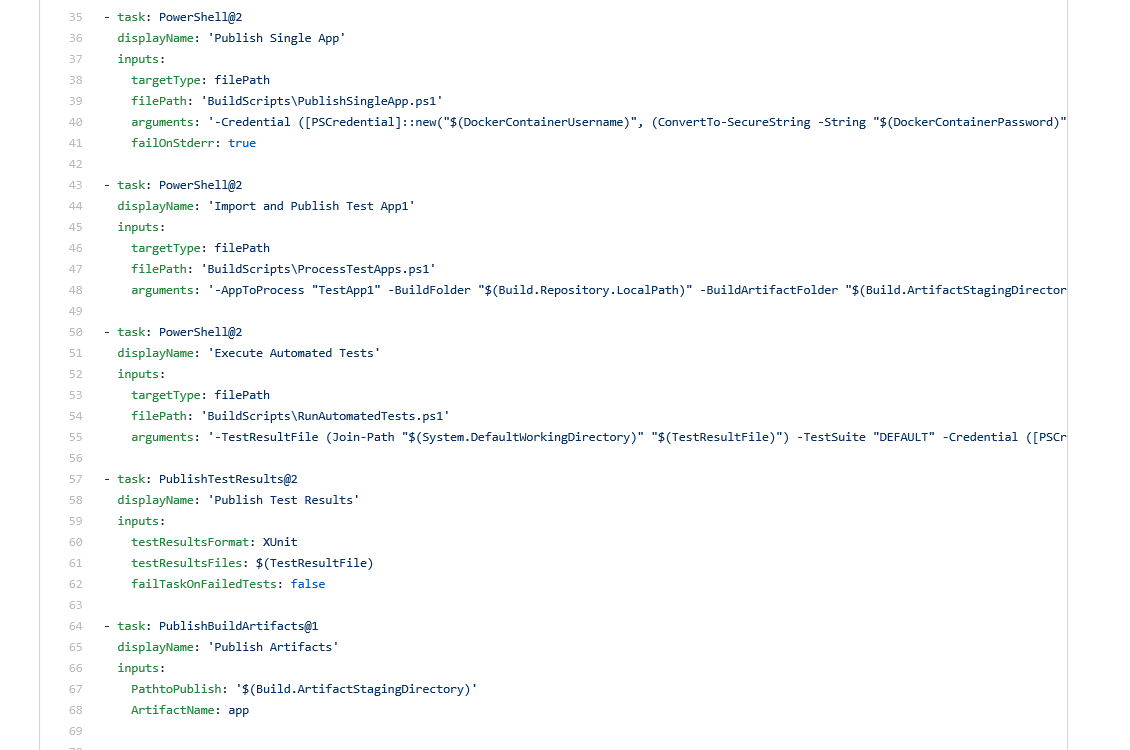
In the YAML file, add a new step for each test application which needs to be installed on the docker container. Example of the code can be found below. Remember to add in AppToProcess the Id of the Test Application which is in the settings.json file.
– task: PowerShell@2
displayName: ‘Import and Publish Test App1’
inputs:
targetType: filePath
filePath: ‘BuildScripts\ProcessTestApps.ps1’
arguments: ‘-AppToProcess “TestApp1” -BuildFolder “$(Build.Repository.LocalPath)” -BuildArtifactFolder “$(Build.ArtifactStagingDirectory)” -RepositoryExternalUser “$(RepositoryExter-nalUser)” -RepositoryExternalPAT “$(RepositoryExternalPAT)” -credential ([PSCreden-tial]::new(“$(DockerContainerUsername)”, (ConvertTo-SecureString -String “$(DockerContain-erPassword)” -AsPlainText -Force)))’
Run the tests
Alright, first part is covered. Now we need to run the tests. I will use NAVContainerHelper (again) but before we need to fill the test suite in Business Central with the tests which should be run.
And for that in the test extension, an install Codeunit is required. It should create a DEFAULT test suite (or any other which is needed) and add Codeunits and the test procedures to it.
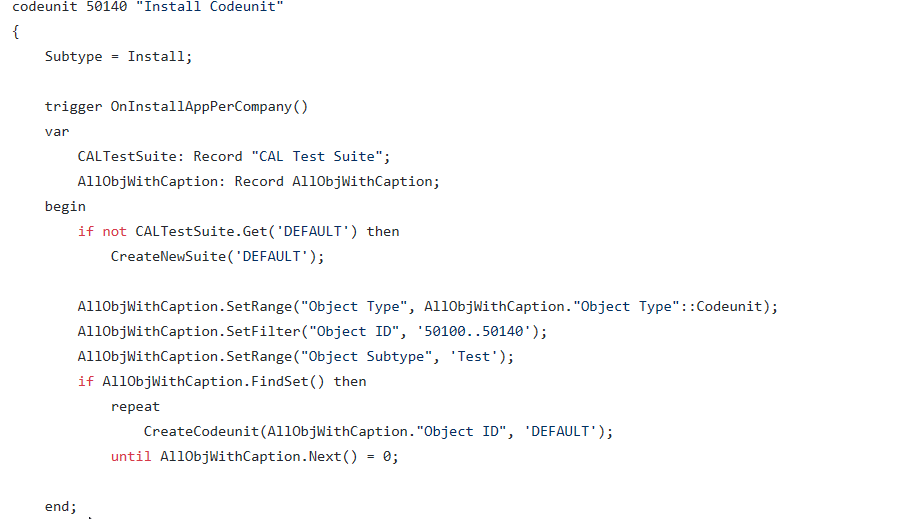
Example of the Codeunit you can find here:
https://github.com/mynavblog/AzureBuildPipeline/blob/master/Cod50140.Install.al
Just note that I hardcode (I hate that but here it is acceptable) which Codeunits should be added.
And finally the last PowerShell script is needed. It will run the tests in the container. The example can be found here:
https://github.com/mynavblog/AzureBuildPipeline/blob/master/BuildScripts/RunAutomatedTests.ps1
After running it, the results will be exported to XML file from Business Central and in the next step will be imported to Azure DevOps. In the YAML file, add a new step to run the tests. Example of the code can be found below. The Test Suite name is needed in the argument.
– task: PowerShell@2
displayName: ‘Execute Automated Tests’
inputs:
targetType: filePath
filePath: ‘BuildScripts\RunAutomatedTests.ps1’
arguments: ‘-TestResultFile (Join-Path “$(System.DefaultWorkingDirectory)” “$(TestResultFile)”) -TestSuite “DEFAULT” -Credential ([PSCredential]::new(“$(DockerContainerUsername)”, (ConvertTo-SecureString -String “$(DockerContainerPassword)” -AsPlainText -Force)))’
Publish Test Results
The last step for this quite long article is to publish test results in the Azure DevOps. And decide if the failed tests should stop the build. For that we only need the step in the YAML file. Example you can find below
– task: PublishTestResults@2
displayName: ‘Publish Test Results’
inputs:
testResultsFormat: XUnit
testResultsFiles: $(TestResultFile)
failTaskOnFailedTests: false
As you see the parameter failTaskOnFailedTests decides if the build is successful.
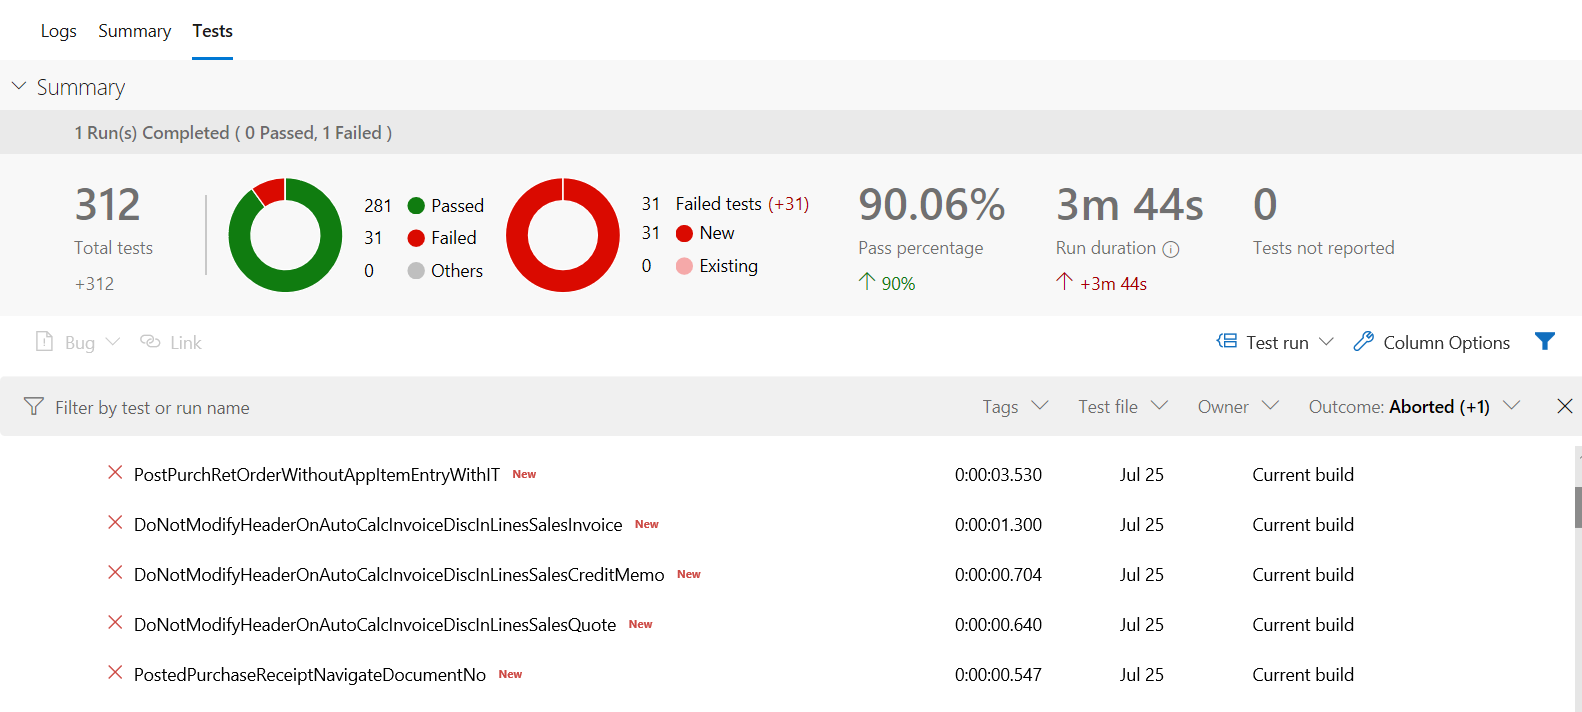
Now, all run tests can be seen from Azure DevOps when the build is run.
Summary
A full YAML file with tests for the single application builds you can find here:
https://github.com/mynavblog/AzureBuildPipeline/blob/master/BuildScripts/CISingleAppWithTest.yml
In the next article, I will try to show how to change the pipeline if build requires multiple extensions from different repositories.
Telemetry – Get more info about the users (Part 2)

#NAVdevTips 1: After really means after

One Comment