Automated Builds – Part 3: Install Docker Container
This is the 3rd article in the series how to prepare the automated builds. In previous one I wrote how to set agent on self-hosted server. In this part I will show how to create the build pipeline with few steps: receive files from Azure DevOps, Install NAVContainerHelper and run the script which will create a container with Business Central.
Creating Build Pipeline
The build pipeline is the list of steps which is executed during build. For the pipelines we will use YAML file. As you will see the file contains the steps but also information how the pipeline should be triggered. More about schema of the file you can read here:
https://docs.microsoft.com/en-us/azure/devops/pipelines/yaml-schema?view=azure-devops&tabs=schema
New YAML file
First step to build the pipeline is to add to your repository a new file. You can name it as you want. It must have extension yml. For all the examples I created new folder in my repository BuildScripts and there I will put all files which will be created during the demo.

Let’s put some content to the file. At this point we do not need more – we will extend it later.
variables:
build.clean: all
platform: x64trigger: none
As you can see I put trigger: none. It means that my builds will be run manually. For the testing it is the best approach. Otherwise it will be run every time when you change any file in the repository.
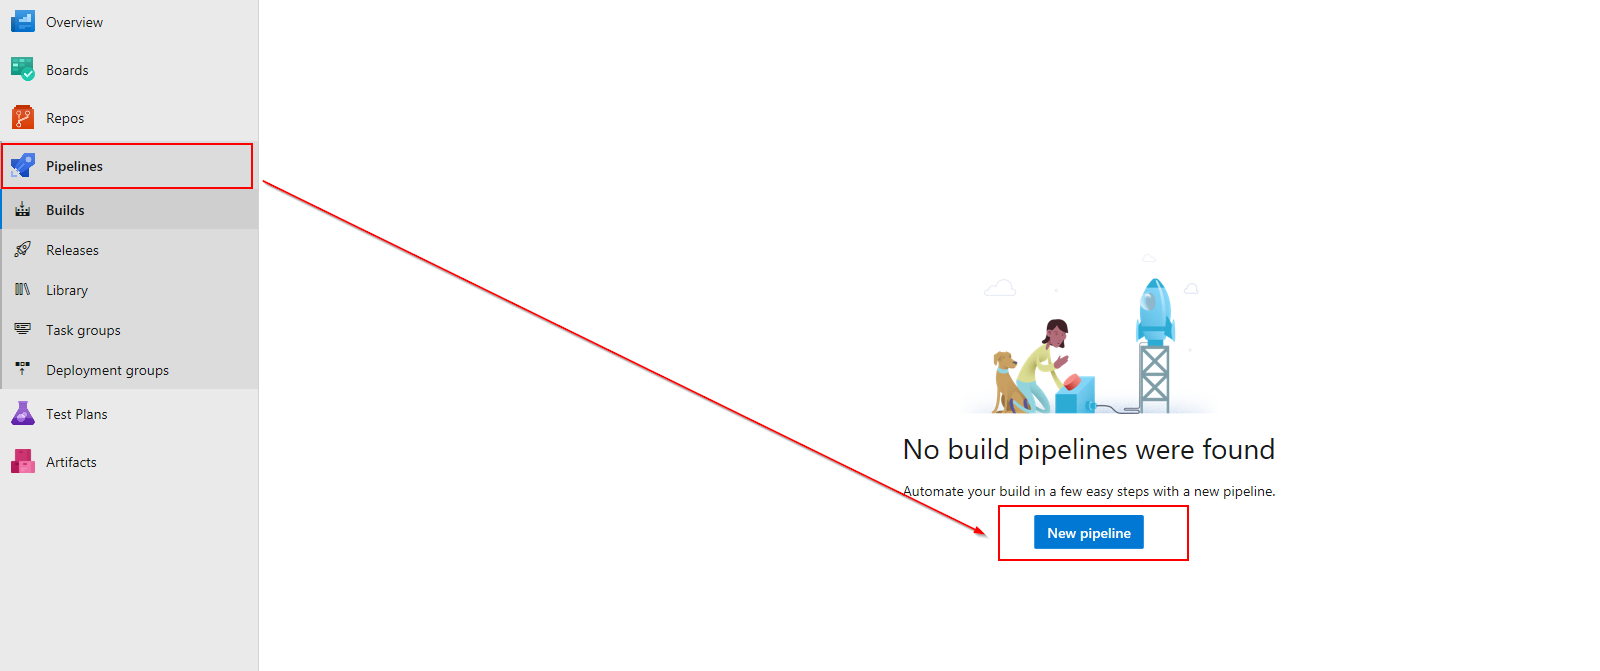
New Build Pipeline
To create a new pipeline, go to the Pipelines and click new pipeline. Choose to use the classic editor.
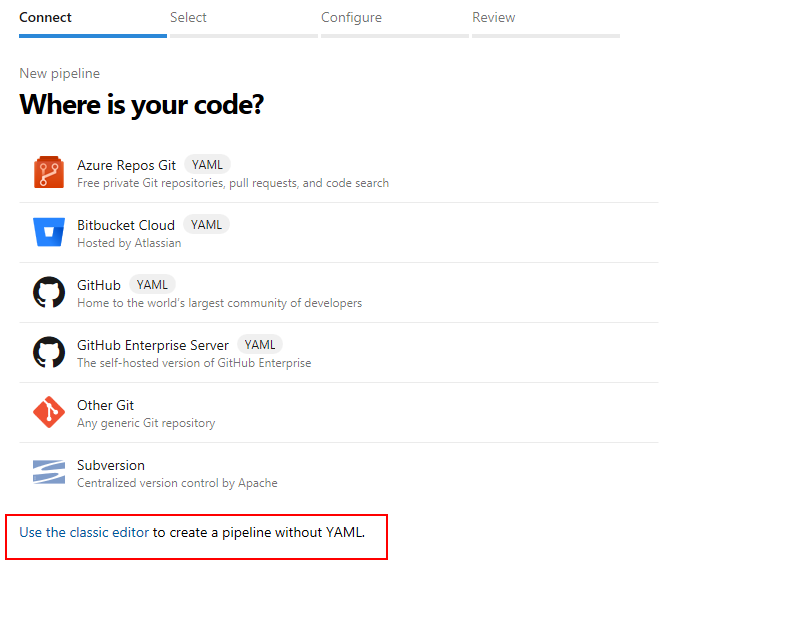
Choose the repository and the branch from your project for which the pipeline should be built. And on the next page choose YAML as a configuration.

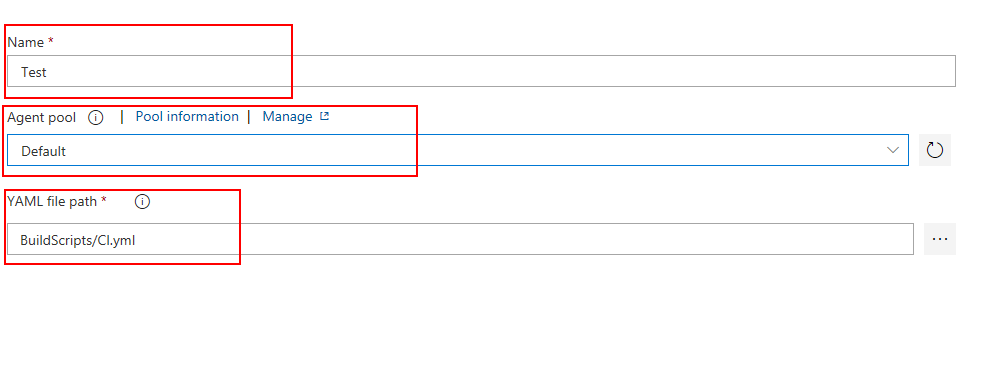
In next step fill the name of the pipeline, the agent pool which was created in the Part 2 of the series and choose the YAML file which we created before.
Settings file
At this point we have the pipeline but without any task it is useless. Next step will be to create new steps for it. But first we will create a json file which will store all settings. Create an empty json file and . name it settings.json. Put it in the same folder as YAML file.
Adding first step: Install NAVContainerHelper
The first step in our flow will be installation of NAVContainerHelper. More information about it you can find on GitHub https://github.com/microsoft/navcontainerhelper or on Freddy’s blog https://freddysblog.com/ . The module gives us a possibility to do a lot of things directly in the docker container.
The PowerShell script for install it you can find here: https://github.com/mynavblog/AzureBuildPipeline/blob/master/BuildScripts/InstallNAVContainerHelper.ps1 . I should thank to Freddy for it cause I found it in some materials and I just adopt it to my purposes. It checks if latest version of the module is installed and if not download and install it.
Now we need to add it to steps in our YAML file. Open it and add the step to run the PowerShell Script.
steps:
– task: PowerShell@2
displayName: ‘Install NAVContainerHelper’
inputs:
targetType: filePath
filePath: ‘BuildScripts\InstallNAVContainerHelper.ps1’
Next step: Create Docker Container
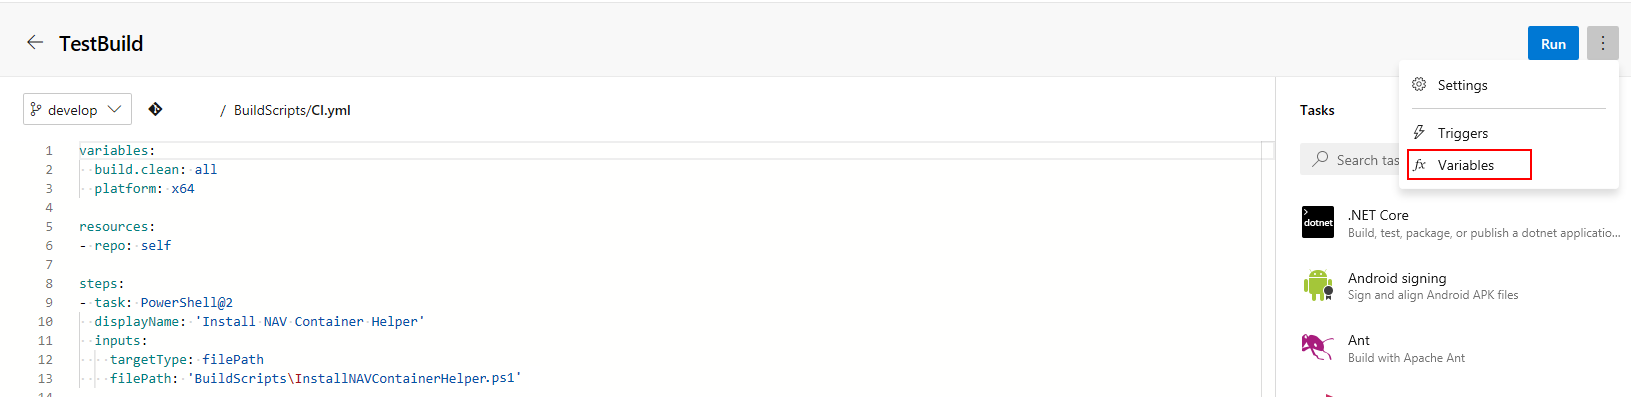
To create a container with Business Central we need a user and a password which will be used for authentication. For that we will add to our pipeline two new global variables. Go to Pipeline and Edit created pipeline.
Add two new variables with values.
- DockerContainerUsername – variable will store username which is set as an administrator for created docker container (the Business Central user)
- DockerContainerPassword – variable will store password for the user specified in DockerContainerUsername variable (for the Business Central user)
Now we need to specify the container name, image and license file which we will use for creating the container. Those values we will stored in the settings.json file because it will be easier for project members to change them later if needed.
Go to the settings.json file which was created and add new variables in the json:
- ContainerName – variable will store the name of the docker container which will be created for the builds
- ContainerImage – variable will store the image of the docker container which will be created for the builds
- ContainerLicFile – variable will store the path to license file which should be used for container (the path should be visible from the build server). Remember to put paths with double “\”
Your file should look similar to this right now:
{
“ContainerName”: “bcbuild”,
“ContainerImage”: “mcr.microsoft.com/businesscentral/onprem:dk”,
“ContainerLicFile”: “C:\\temp\\lic.flf”
}
Now we need the PowerShell script which will create a container. For that we will use NAVContainerHelper. The example you can find here: https://github.com/mynavblog/AzureBuildPipeline/blob/master/BuildScripts/CreateDockerContainer.ps1
It reads the settings file and create a container. As you can see it add the premium plan to it and also install Test Toolkit which will later allow as to run the automated tests.
When we already have the script in the repository (put it in the BuildScripts folder) we need to add the step in YAML file. Example of the code can be found below. The step use arguments with global variables created before.
– task: PowerShell@2
displayName: ‘Create Build Docker Container’
inputs:
targetType: filePath
filePath: ‘BuildScripts\CreateDockerContainer.ps1’
arguments: ‘-credential ([PSCredential]::new(“$(DockerContainerUsername)”, (ConvertTo-SecureString -String “$(DockerContainerPassword)” -AsPlainText -Force)))’
Summary
At this moment we have in our build few steps. Your pipeline should look similar to presented below.
If you would queue the build then you will see that in fact there are more steps than those two which we added. In the first steps agent download the repository to our build server. In the last steps it finish build.
Remember that first time creating the container may take some time. System needs to download Business Central image.
In next articles I will go thru next steps in the pipeline. We will copy the files to the container (if needed) and then compile and publish the extension.

#NAVdevInfo 1: NAV2018 – Lists have tooltips
#NAVdevInfo 2: New Snippets for AL