Automated Builds – Part 2: Install Agent
This is the second article in the series how to prepare automated builds. In the first part I described what are the goals will be achieved. Now I will guide you thru first step of the process: connecting Azure DevOps and your local hosted build server.
Important thing before start: you need to have administration rights in Azure DevOps for the project and for the organization where the setup will be done. Also administration rights are needed on your build server.
Creating PAT
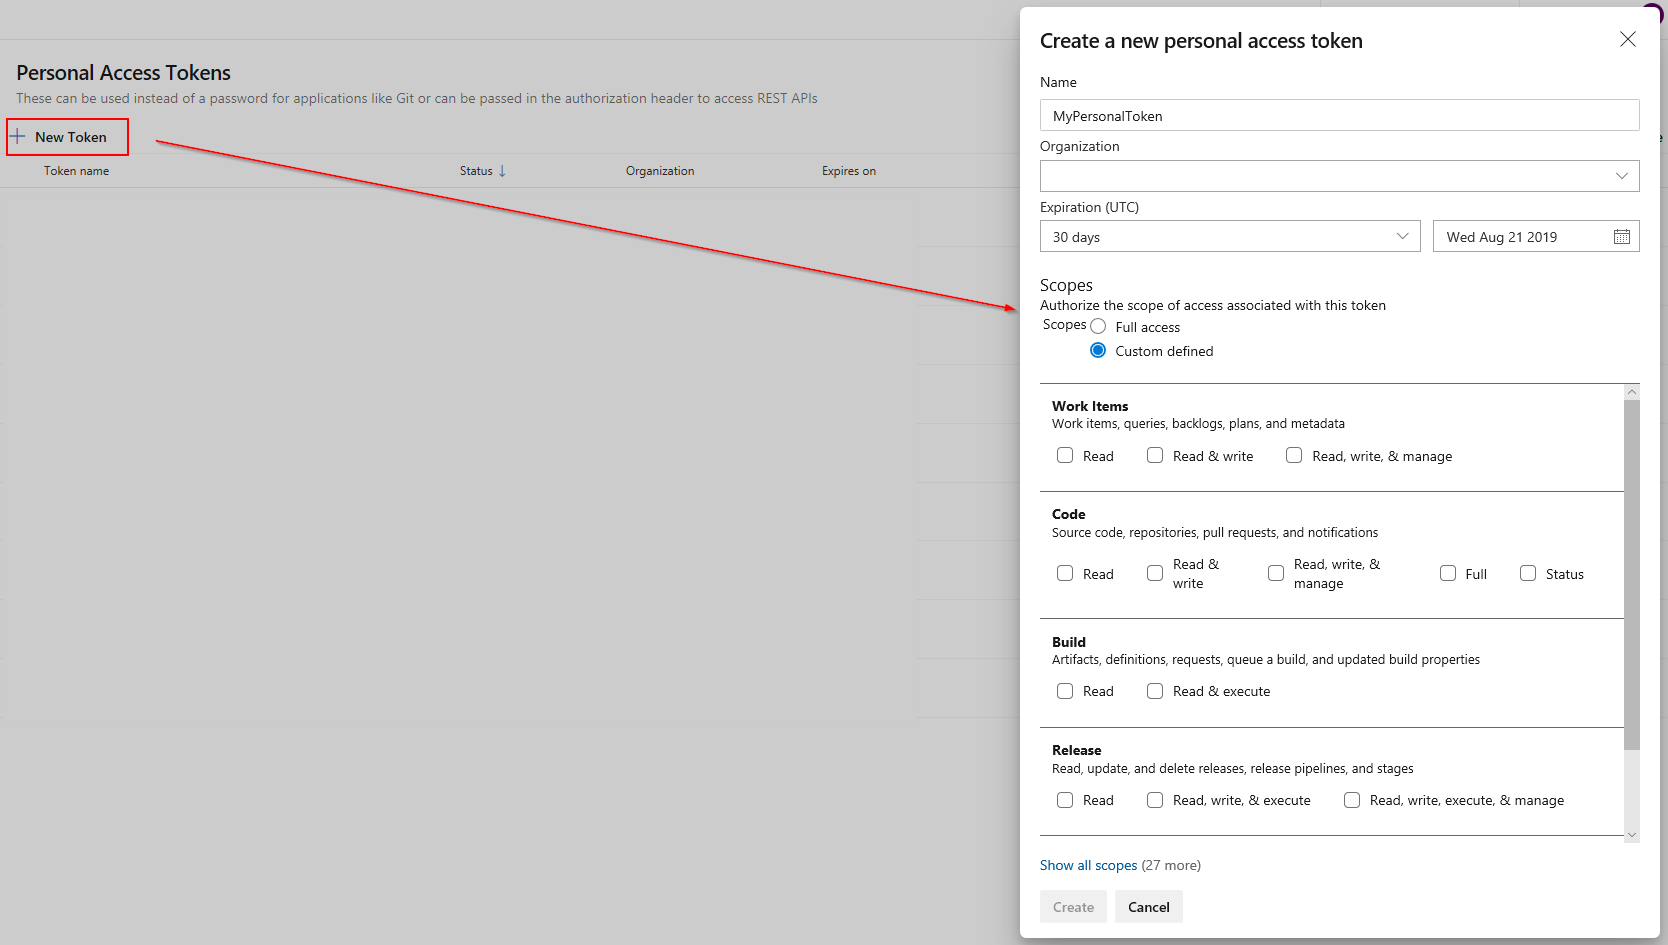
PAT is abbreviation for Personal Access Token. We can say that, it can be used instead of password. It is possible to authenticate the user with PAT and specific rights. Also it is possible to give expire date to PAT. Which means that after specified period it will be not valid anymore.
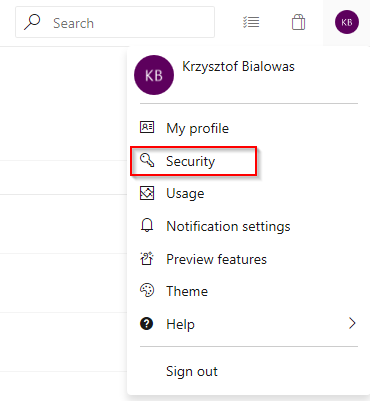
To create a new token for Personal Access, go to the security settings for the user. Then create new Token. Set the proper permission for it and add the name.
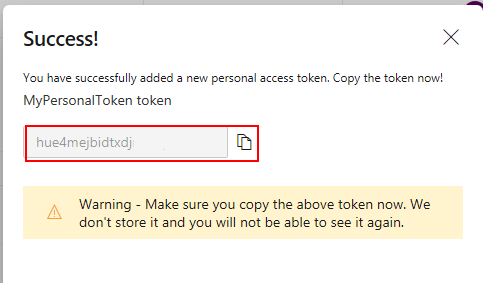
After successful creation of the token, copy it because it is not stored in Azure DevOps.
Connect Azure DevOps and Server with Build Agent
For running builds on your local hosted server we need to install the agent on that machine. For the demo purposes I had setup everything on my own laptop but of course it is not the best place to run automated builds when more than one person is working on the project. However if you want to train the workflow, you can do the same.
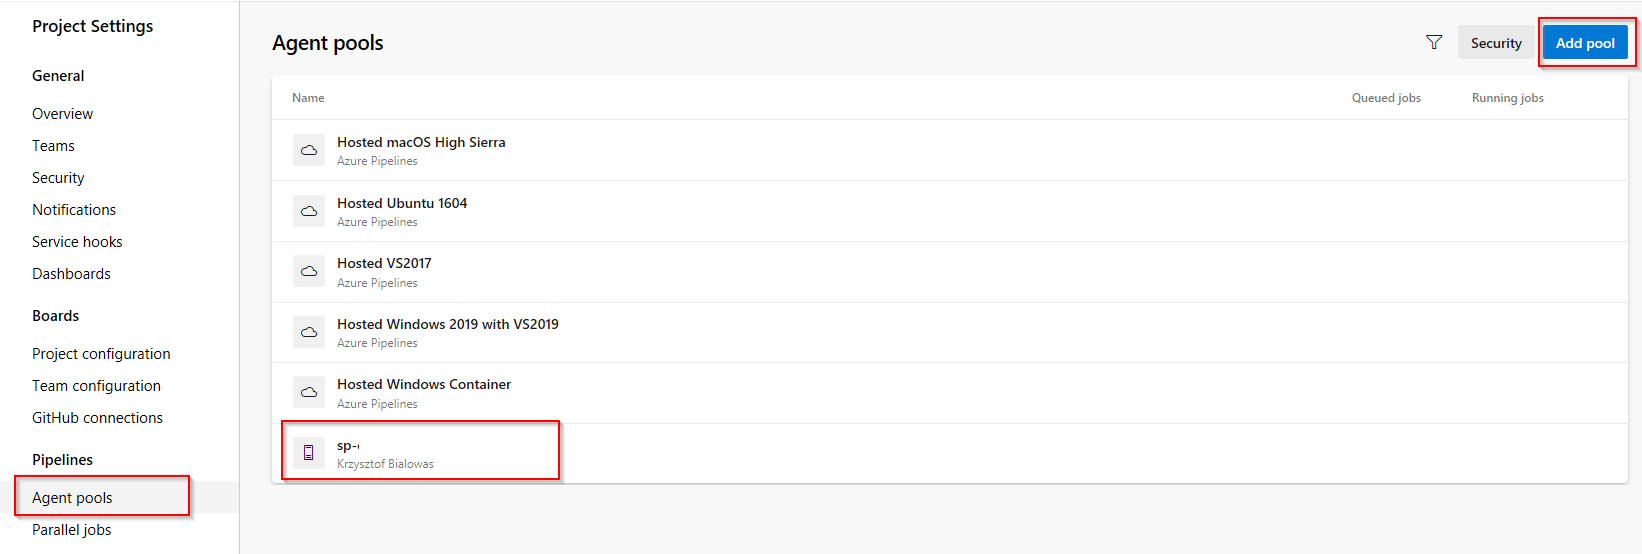
First step is to create a new agent pool. In the Project Settings it is necessary to go to Agent Pools and Add pool.
When the pool is created open it and add New agent. The agent can be downloaded directly from Azure DevOps.
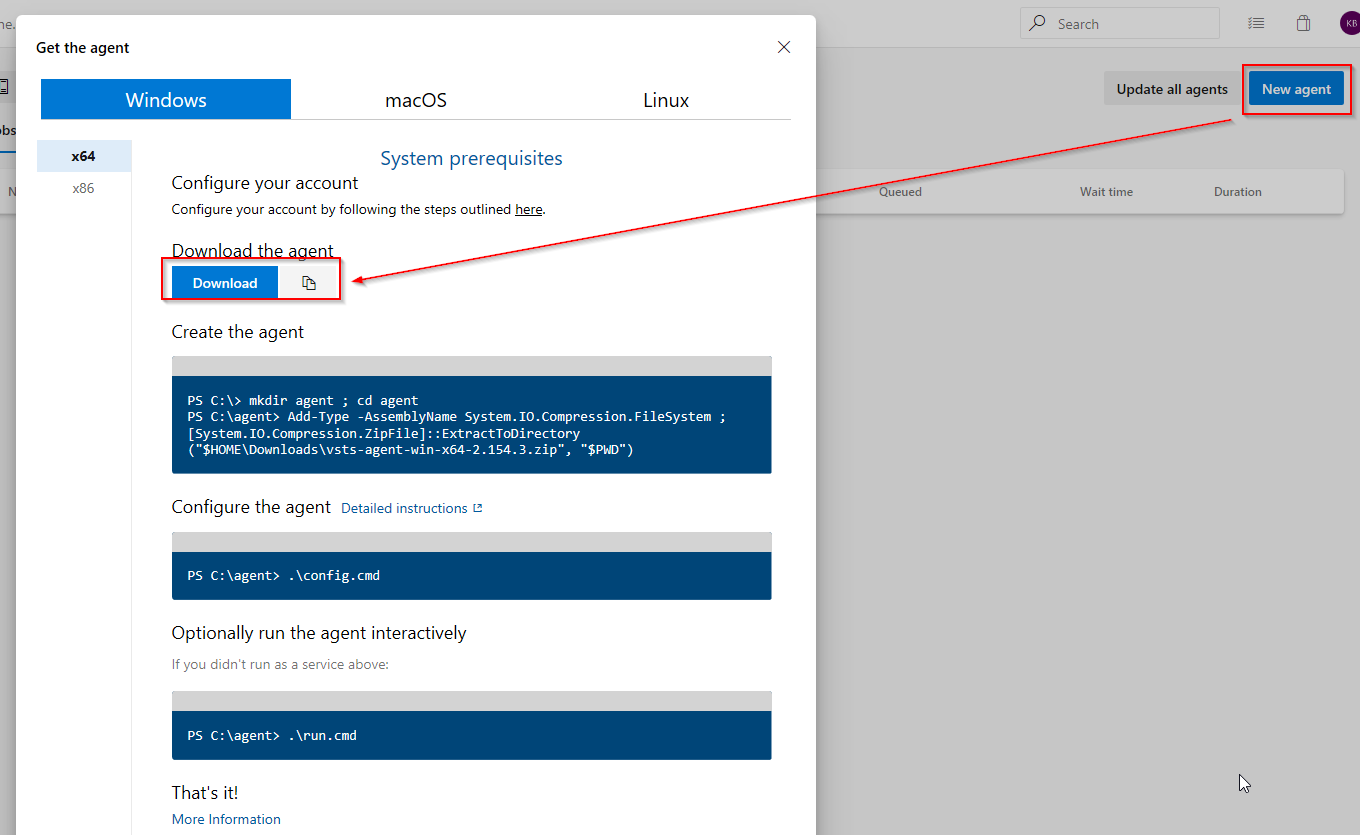
Unpack the zip file on the server where the builds will be executed and as an administrator run the config file.
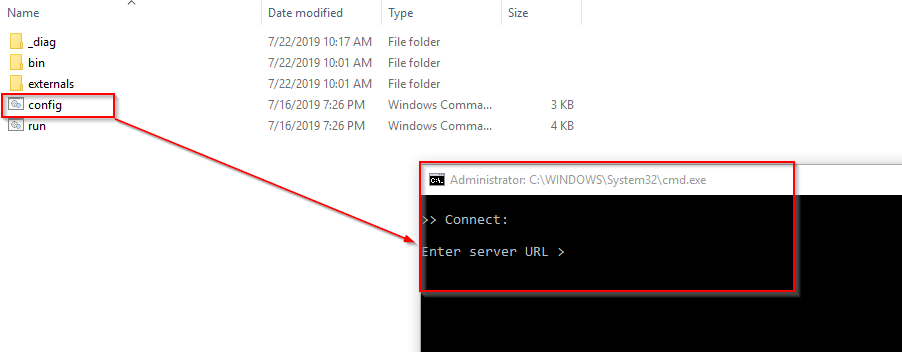
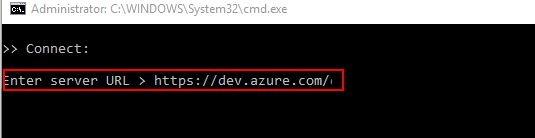
As a Server URL set URL to your organization page on Azure DevOps.
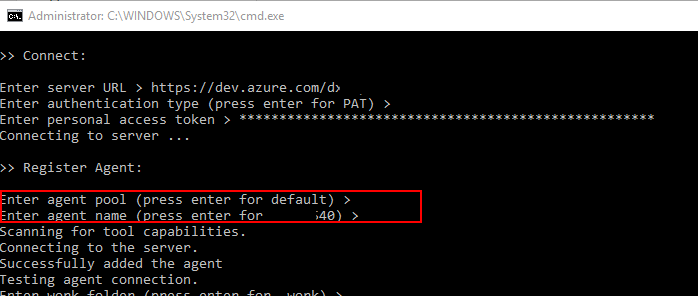
In the next step, as authentication type, use PAT (as default click enter). And copy your PAT created before.

Enter created pool agent (or press enter for default) and put name for the agent (or press enter for default). Leave work folder as default.
If you want to run agent as a service in next step write Y.
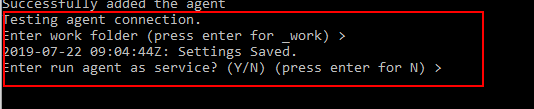
After successful configuration run as an administrator the agent.

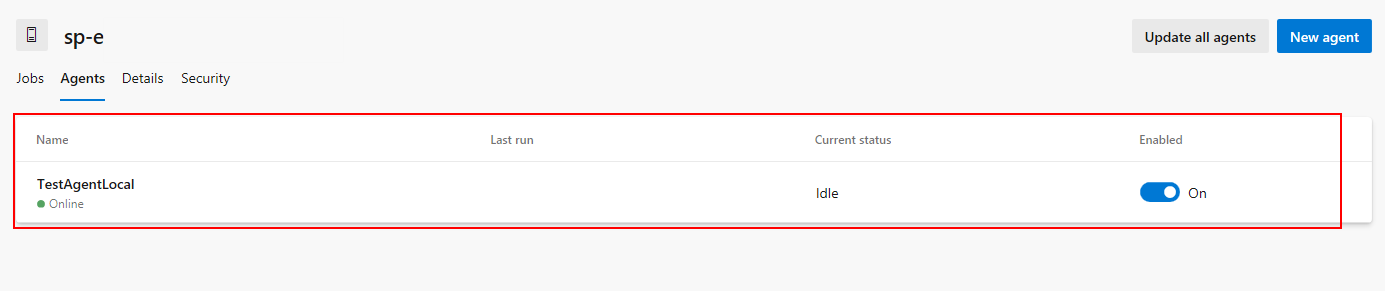
When configuration is done and agent is running on the machine where the builds will be executed, the new agent is visible in Azure DevOps.
Now we are ready to create our first build pipeline. I will describe it in next part of the series.
Non-blocking number series – What is behind?
Telemetry – Get more info about the users (Part 2)